The scheduling feature is only available on plans above a Pro50. This feature allows a user to create time-based exceptions to their network. You an allow what you normally block, and block what you normally allow.
Basic and Advanced Offering
There are two offerings with the scheduler.
| Type | Features | Plan |
|---|---|---|
| Basic | 2 schedules per profile. Rules apply every day. | Pro50 |
| Advanced | Unlimited schedules per profile. Rules apply to individual days (e.g., Mon, Wed, Sun) or groups of days (e.g. weekends, weekdays). | Pro100 + |
Scheduler in the Dashboard


The scheduler is bound to a specific profile. Be sure to create the schedule for the correct profile.
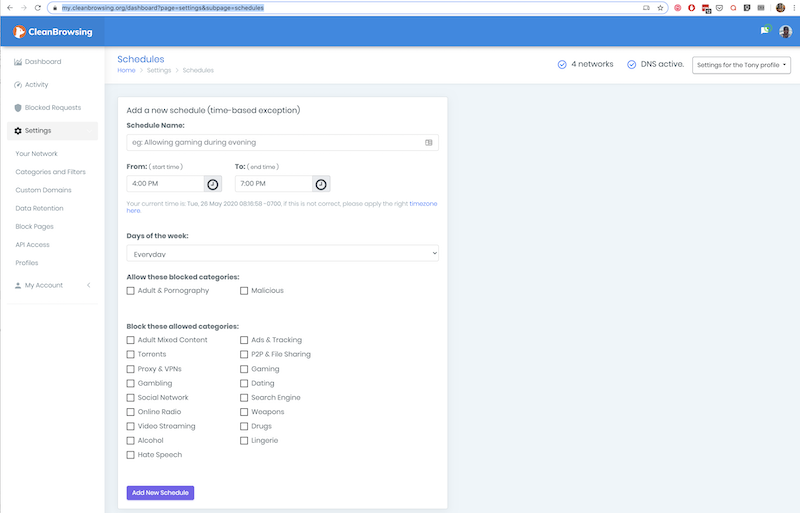
The scheduler allows you to create schedules according to the “Categories” or “Predefined Platform Filters”. The schedule will override existing settings in any select profile.Scheduler will Show what is already Blocked or Allowed
The scheduler will show you what is currently blocked or allowed. It does the same for the Predefined Platform Filters:
The choices made in the Category and Predefined Platform filters will override all existing configurations during the time period selected.
Examples of what can be done:
- If Video Streaming is blocked via the categories, the same category can be unblocked during a specific time period as defined in the scheduler;
- If Gaming is always blocked via the categories, but you are ok with Roblox between 5 pm and 10 pm, it can be unblocked during a specific time period as defined in the scheduler;
Creating the Schedule
Here is a quick video of how to create a schedule:https://www.youtube.com/embed/ft79Dqdw-_M?feature=oembed
Step 1: Choose Your Profile
To start, access the scheduler in your dashboard settings. The module is located found in your Table of Contents (left-hand navigation) under Categories Scheduler.
Step 2. Create a Schedule
When creating a schedule there are some things to be considerate of:
- Give your schedule a name that makes sense.
- Make sure to provide a good time with a start and end time.
- The system will automatically identify what is allowed, and what is not allowed in the default configuration and choose what action is available.
- The current implementation only allows existing filters, but we’ll expose custom domains and other rules in the near future
- Every schedule is tied to a profile, so you only see the schedule in it’s respective profile.
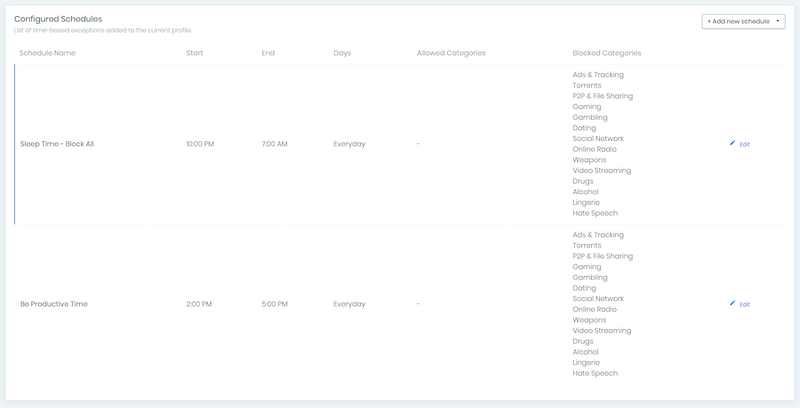
Once you are done, you’ll be able to see your schedules like this:

