Activating CleanBrowsing on your Windows device is facilitate through one of our apps. Follow the steps below to enjoy a safe browsing experience on your machine.
Tech talk: CleanBrowsing is a DNS-based filter that prevents adult content from being loaded. It doesn’t require any software installation and can be easily enabled anywhere by switching your DNS servers to the ones we provide. We also offer Apps for the major devices in order to simplify your life.
🛡️ CleanBrowsing: Internet Safety Made Simple
Filter harmful websites, block adult content, and protect your entire network. All with fast, privacy-respecting DNS.
Start Filtering Here →You have two options when configuring Windows:
Option 1: Configure with CleanBrowsing Windows App
The easiest way to install CleanBrowsing on your Windows device is to use our App. It saves time and avoids some of the more common mistakes users make when configuring DNS manually.
Latest Version: 1.5.2 | Release Date: 02/2023
Quick navigation links to different sections in the guide that will help you configure CleanBrowsing on Windows:
- Working with Free Filters
- Configuring Paid Filters
- Password Protect Application
- Disable Users ability to Uninstall
- Disable Users access to Internet Options
- Manually Configure using Command Line
Working with Free Filters
Once downloaded, run the installer. A short-cut will be added to your desktop post-installation. Right click, and run as administrator. It should present you a screen like this:
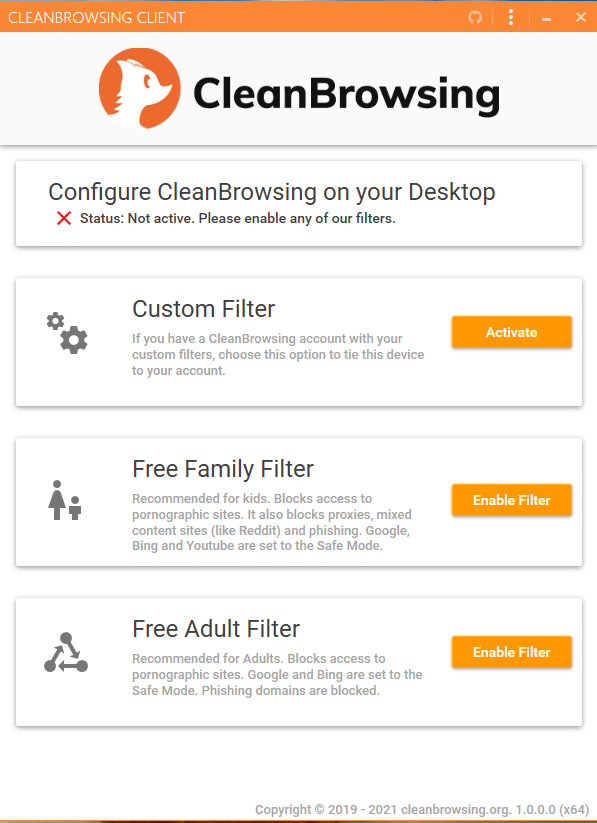
Simply select the filter you want to use and the app will configure your DNS. If using the Free filter it will look like this:
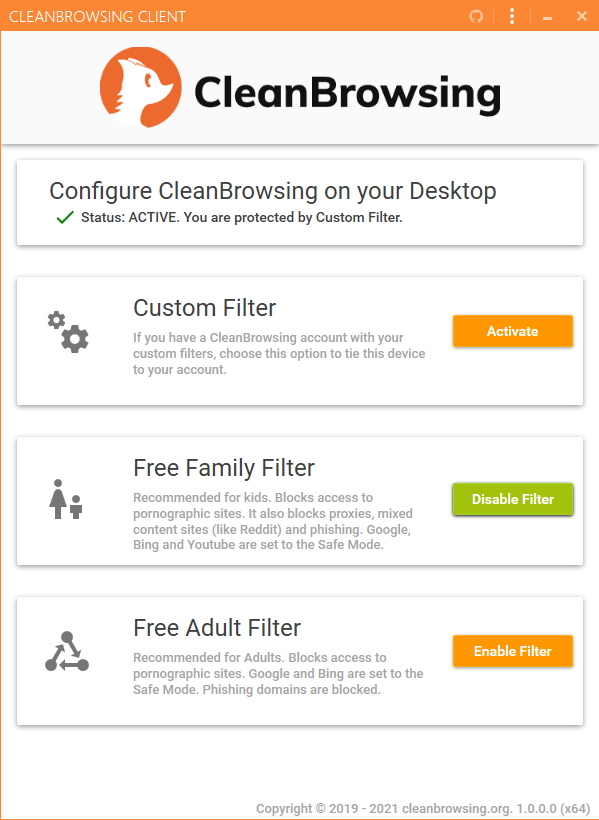
That’s it, your device should be configured.
Configure a Paid Account
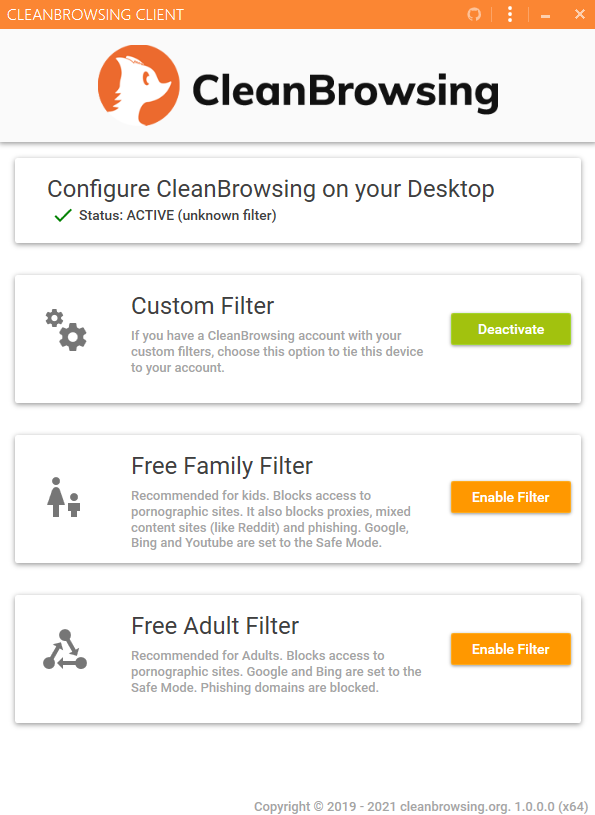
Paid accounts can use this app with their paid account by using the custom option:
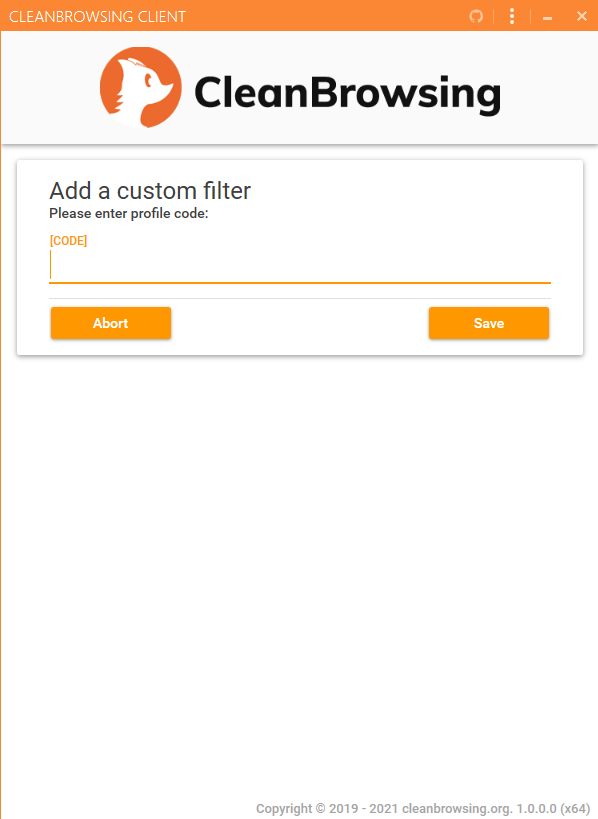
You get the requested code from your dashboard:
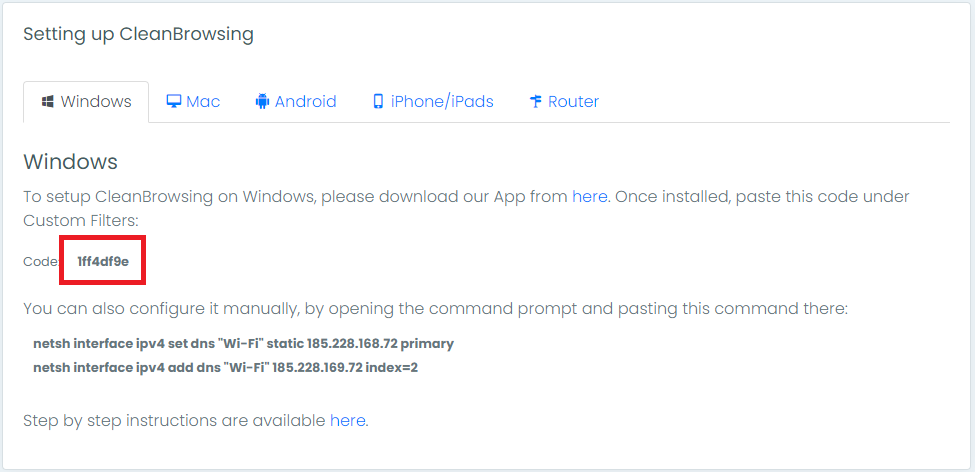
Copy the code into the app:
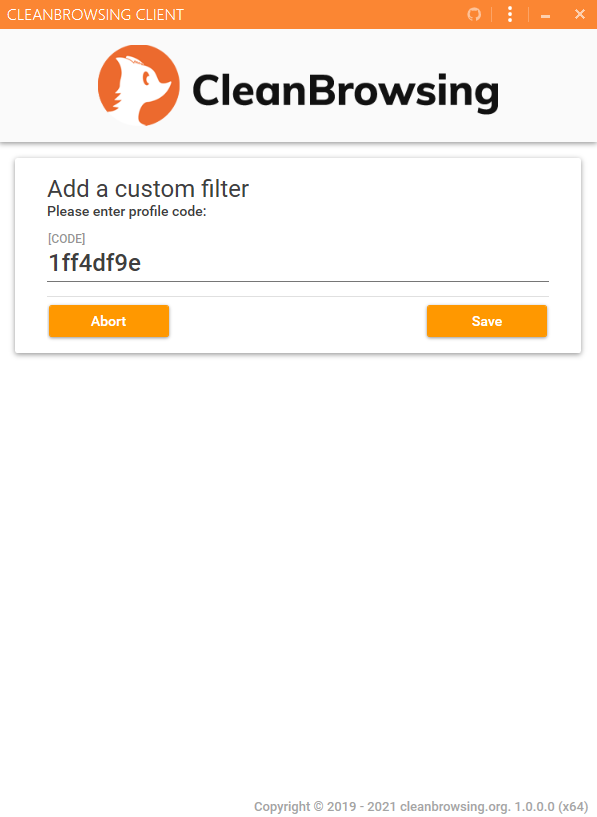
Once activated it will look like this:
Password Protect Application
Harden your installation by configuring a password. This password will prevent a user from changing set filters.
Access the settings page by clicking on the “three stacked” buttons in the title bar (top right):
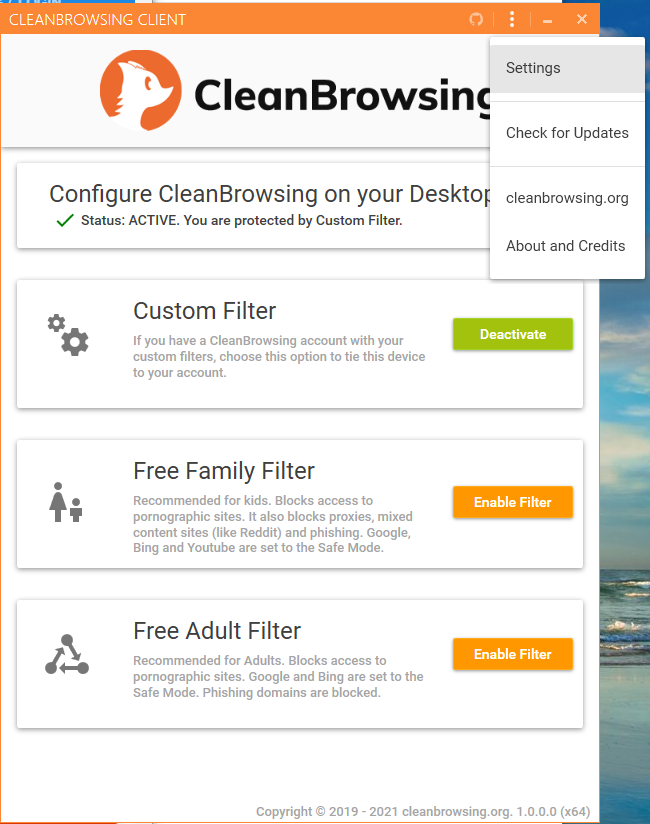
The settings page will introduce a Set Password option:
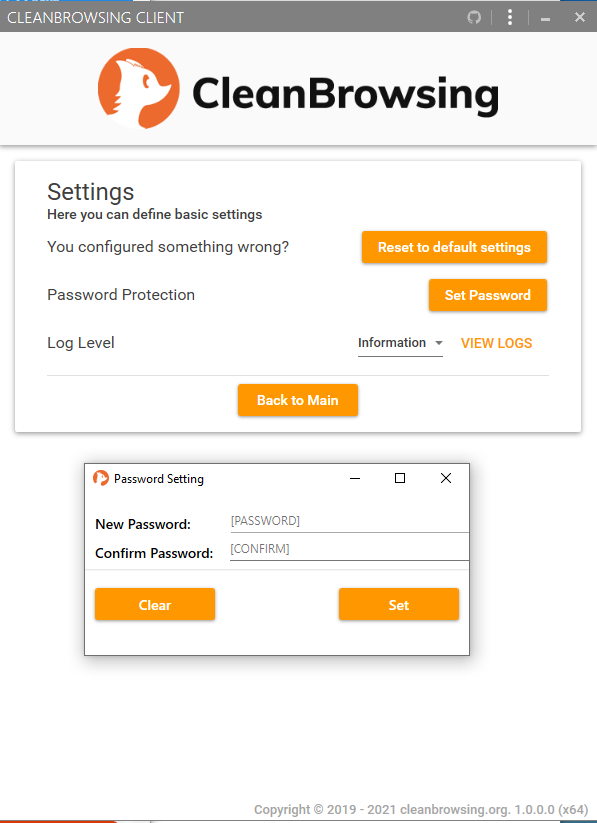
Once set, this password will be required to disable and change set filters.
Application Uninstall Protection (AUP)
This feature is only available on versions 1.3.6 +.
This feature uses advanced system functions to disable the users ability to uninstall the application. This applies to administrators and standard users alike.
This feature is accessed via the settings panel:
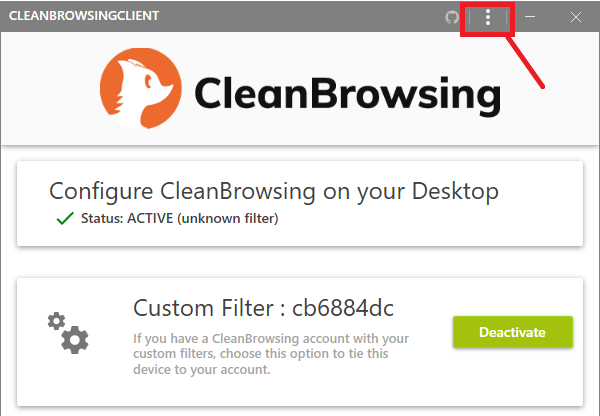
Click on “Settings“
From this page, enable the Application Uninstall Protection (AUP) feature as shown below:
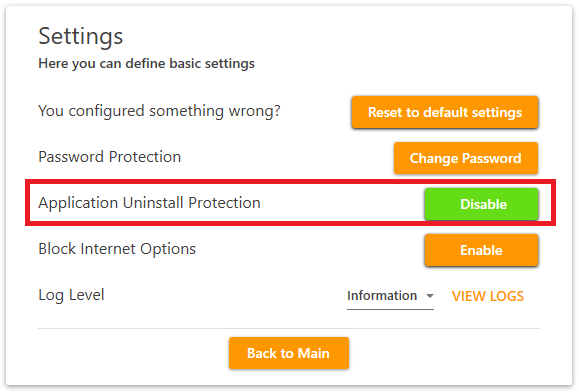
This will make it where the app will “grey” out the “uninstall” option in the Add & Remove programs. See below for the desired outcome:
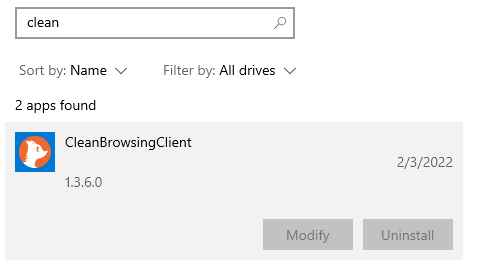
This feature is protected by the passcode option, setting that will prevent the user from disabling it in the app. To allow it to be removed, you must disable it in the CleanBrowsing app first. That will enable the uninstall feature in Add & Remove app.
Block Internet Options (BIO)
This feature disables the users access to Internet Options, a system panel that allows the user to manually override system settings and deploy network settings like DNS. With this option enabled, a user will not be able to access internet options.
You access this feature by navigating to the “settings” panel (same as above). From there, enable the Block Internet Options (BIO) feature:
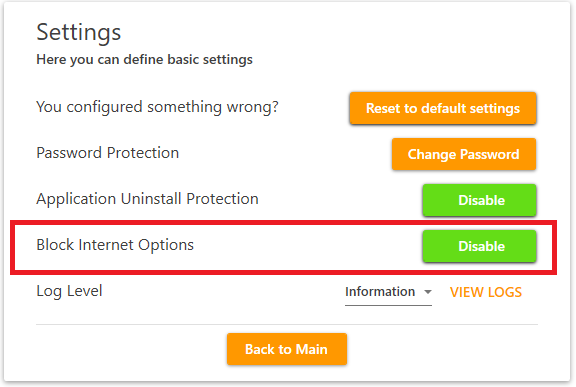
When enabled, the user will not be able to access the Network Sharing center on the Windows devices. See image below:
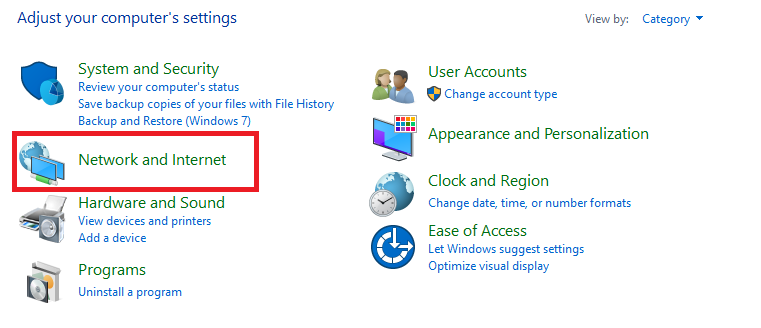
This feature is also protected by the app passcode, and must be disabled to regain access.
Option 2: Configuring Manually (Command Prompt)
In the event the application above does not work for you, you have the option to configure the DNS manually using the following steps:
Step 1: Open Command Prompt
We have tested the following instructions on Windows 10, 2012 and 2016, but should work even on older versions. Start by opening the command prompt as an Administrator.
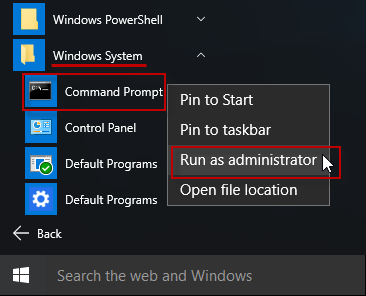
Access the command prompt by clicking on your Windows key on your keyboard, or clicking start.Right click the command prompt option and select “Run as Administrator”:
Step 2: Identify the Network Interface
The network interface is important, it tells you how you are connecting to the internet. If you are using a CAT 5/6 cable then you are most likely going to be using an Ethernet interface, and if you are on Wi-Fi then you will be looking for a Wi-Fi or Wireless Connection interface.
To find your interface, you are going to run a command in the command prompt netsh interface ip show config or ipconfig /all. This is going to give you a long output showing you all the interfaces on your device. It will look something like this:
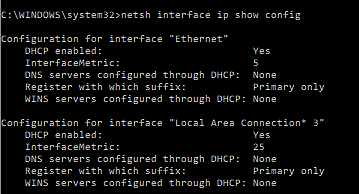
You are looking for the specific interface names. If you are in doubt, you can always update both, the Ethernet and Wi-Fi interfaces. Next step.
Step 3: Use the Command Prompt
Because of the various configurations it’s best to use the command prompt for these changes. There are just too many flavors of the OS and GUI’s available, but the reality is that the command prompt is extremely fast once you get over the nerves of a new environment.
In the command prompt you’re going to use the netsh command. This command-line script utility allows you to modify network configurations.
It will also be in your interest to update both the IPv4 and IPv6 configurations. More and more we’re encountering ISP’s and Routers that are forcing IPv6 in the place of IPv4 so best to be safe. If you are having issues with IPv6 DNS not being recognized it might be indicative of a network issue with IPv6. If you encounter this issue, we recommend disabling IPv6 locally.
PowerShell
If you are an administrator and familiar with PowerShell, you can use the following to set it to all interfaces:
Set-DnsClientServerAddress -InterfaceAlias "Ethernet*" -ServerAddresses "185.228.168.168,185.228.169.168"
Set-DnsClientServerAddress -InterfaceAlias "Wi-Fi*" -ServerAddresses "185.228.168.168,185.228.169.168"
Disable-NetAdapterBinding -Name "*" -ComponentID ms_tcpip6
powershell -noexit
Windows 10
Inside the command prompt, copy and paste the following command to change your DNS for the “Wi-Fi” interface:
IPv4 using Family Filter:
netsh interface ipv4 set dns "Wi-Fi" static 185.228.168.168 primary
netsh interface ipv4 add dns "Wi-Fi" 185.228.169.168 index=2
IPv6 using Family Filter:
netsh interface ipv6 set dns "Wi-Fi" static 2a0d:2a00:1:: primary
netsh interface ipv6 add dns "Wi-Fi" 2a0d:2a00:2:: index=2
Windows 7
The command for Windows 7 is slightly different. For IPv4:
netsh interface ip set dns "Wi-Fi" static 185.228.168.168For IPv6:
netsh interface ipv6 set dns "Wi-Fi" static 2a0d:2a00:1::If there are no warning, it means the change succeeded. You can confirm it was modified by running:
netsh interface ip show configIt should list our IP addresses under the Statically Configured DNS Servers under the interface selected. If the command fails, it means that your Interface is not named “Wi-Fi”. Try changing it to one of the other interfaces we went over in Step 2. Examples: “Wireless Network Connection” or “Local Area Connection” to see if it works:
Example of what that might look like
netsh interface ipv4 set dns "Wireless Network Connection" static 185.228.168.168 primary
netsh interface ipv4 add dns "Wireless Network Connection" 185.228.169.168 index=2
netsh interface ipv4 set dns "Local Area Connection" static 185.228.168.168 primary
That’s it. If this worked, your computer will automatically start using CleanBrowsing.
🚀 Power Your Web Infrastructure with NOC
NOC combines authoritative DNS, a global CDN, and an intelligent WAF into one high-performance platform. Protect your sites, reduce latency, and gain full control over your delivery stack.
Visit NOC →Final Step: Verify Configuration
The final step is to verify the DNS configuration is working. You can use DNS Leak Test to help with this.
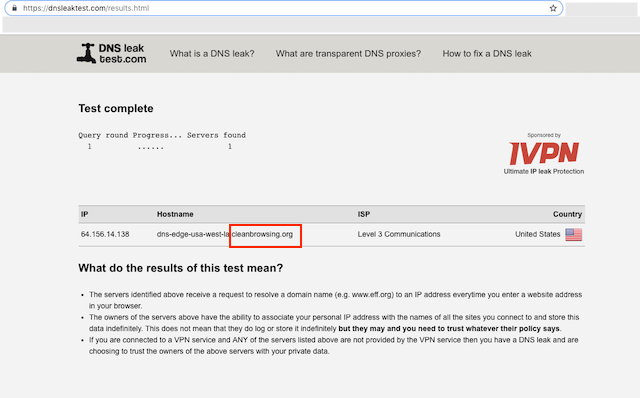
You will run the Standard Test. The output should show CleanBrowsing in the response.
It is advised to take the time to flush your DNS resolver cache on your local machine and browser caches to ensure that your new DNS configuration settings take affect.It can take 10 – 15 minutes for the change to take affect, be patient. The additional time is the time required for your computer DHCP Lease to get the new DNS. If you disable your Wifi and re-enable, it will force it right away (you can also reboot the router).
If you experience issues please visit our Common Questions and Troubleshooting Guide for more help.
