A common evasion technique network administrators have to contend with is when a user makes local changes to their network settings. In most cases, by default, when a user makes a local change to their network settings they can easily bypass your network controls.
To help mitigate this risk, we will create rules in our router that hijack all DNS requests and force the clients making the request to use your preferred option.
Here is a video that shows you how you can do this:
Redirect DNS Traffic on a Network with DNAT
Step 1. Log into your Firewall / Router
Every router is different, log into yours.
Step 3. Navigate to Routing
This is specific to the Ubiquiti OS but your router might have routing options similar to this.
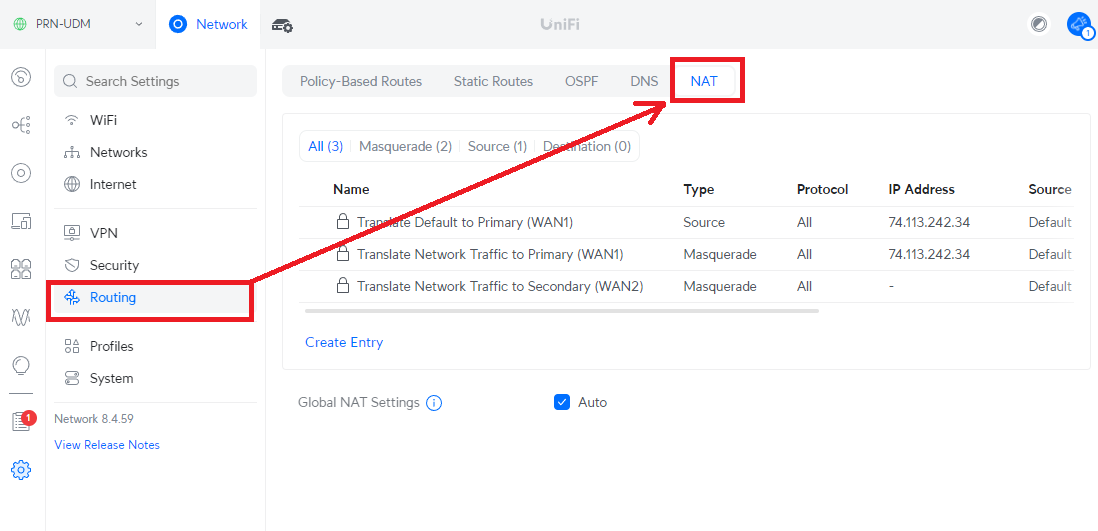
In this instance, you are going to Routing > NAT

Step 4. Destination NAT
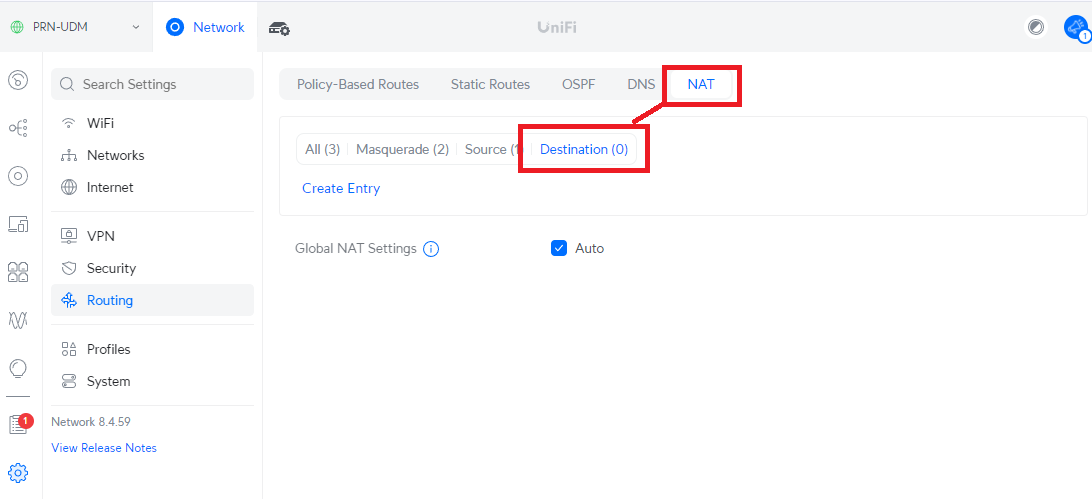
Traditional DNAT is known at Dynamic NAT, which is a bit different here. Instead you want to go to the “Destination” tab on the NAT menu like this:

Step 5. Create a Destination Entry
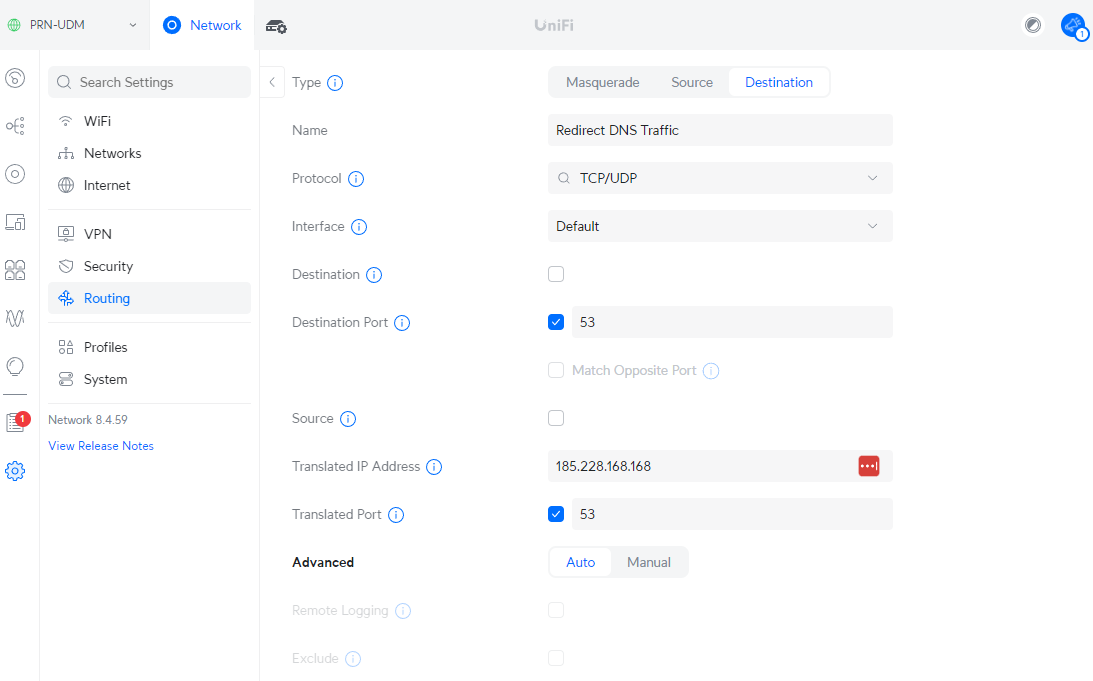
Now we’re going to create a rule that does the routing we want – hijack all DNS requests and force the use of your preferred resolver.
| Attribute | Value |
|---|---|
| Name | Redirect DNS Traffic |
| Protocol | TCP/UDP |
| Interface | Default |
| Destination Port | 53 |
| Translated IP Address | 185.228.168.168 |
| Translated Port | 53 |
The Translated IP Address is where you want to sent the traffic, this is where you can enter your preferred DNS resolver. When it’s done, it’ll look like this:

That should be all you need, give it a minute or two and you should be able to test on your devices.
