An HTTP Archive (HAR) file is a JSON-formatted log of a web browser’s interactions with a web server. HAR files are an industry standard for exchanging information about HTTP requests and responses. They can be used to:
- Debug and visualize web page performance and functionality
- Understand blocked request-responses
- Perform network visualization
- Perform decrypted traffic forensics
- Troubleshoot authentication issues
- Troubleshoot performance issues, such as slow page load or timeouts
When experiencing an issue with a website and while using the CleanBrowsing DNS, a HAR can be invaluable to helping us understand what might be happening.
In this article we’ll walk you through the process of creating a HAR file.
Video Explainer – Creating a HAR File
Written Instructions – Creating a HAR File
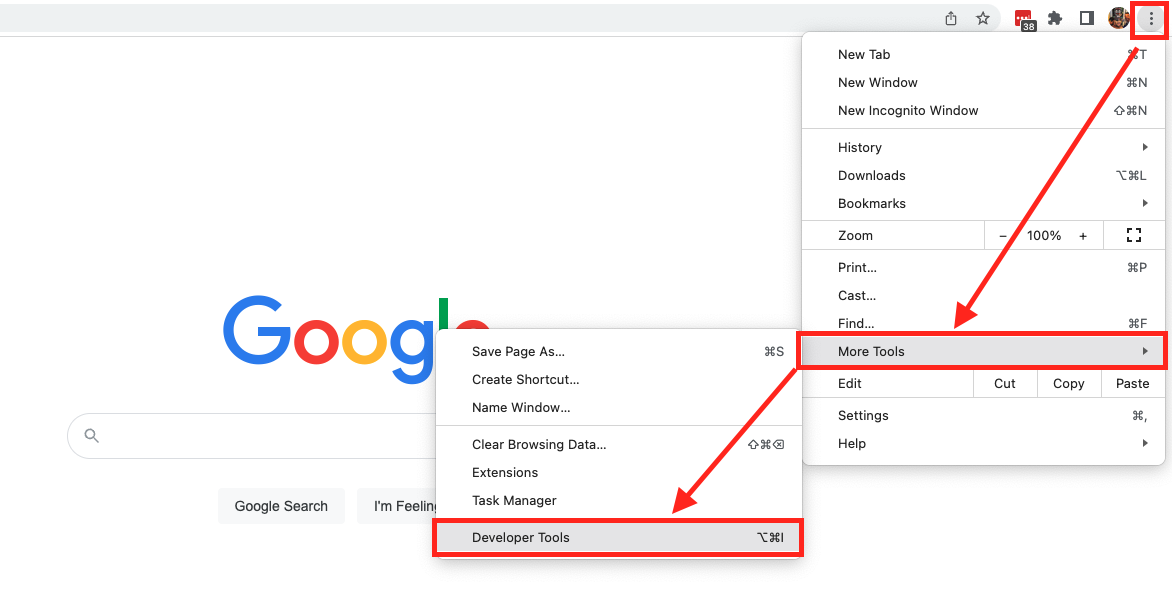
Step 1 – Open Developer Tools
Navigate to More Tools > Developer Tools via your browsers settings.
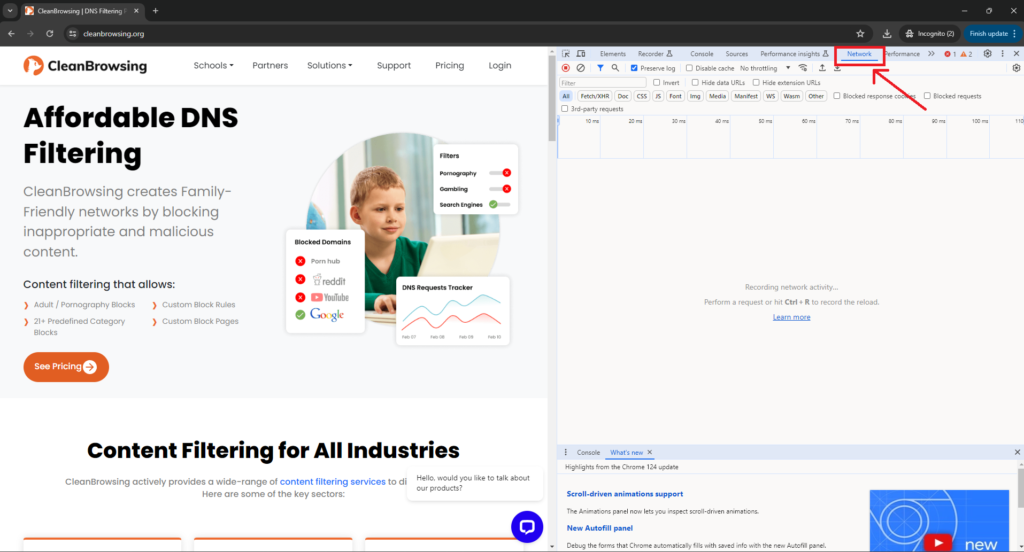
Open the website in question, and click on Network
Step 2 – Start Recording Website Communication
Make sure recording is enabled, this should be on by default, but always good to confirm. You want it to look like this:
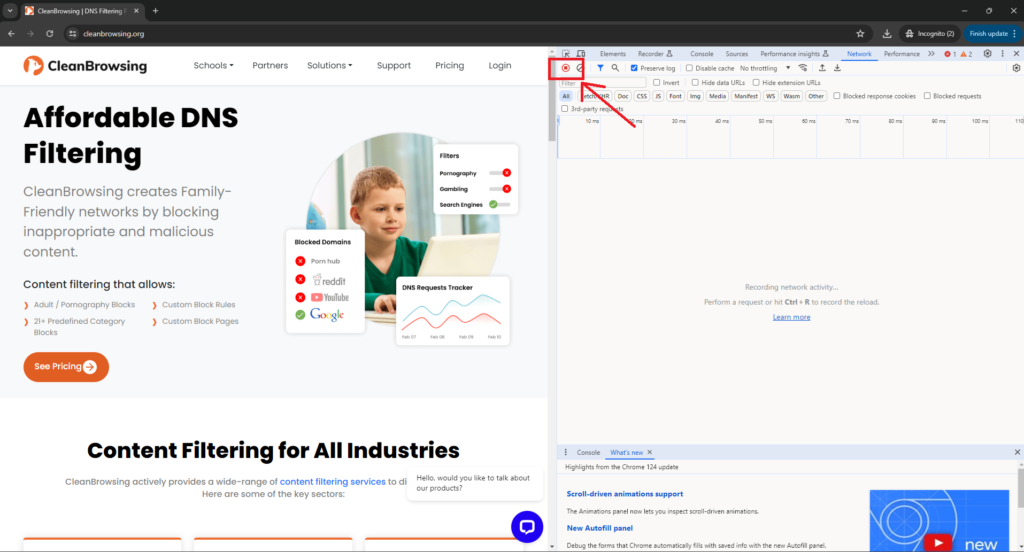
Notice that the recorder looks enabled, that’s what you want.
Step 3 – Preserve the Communication Logs
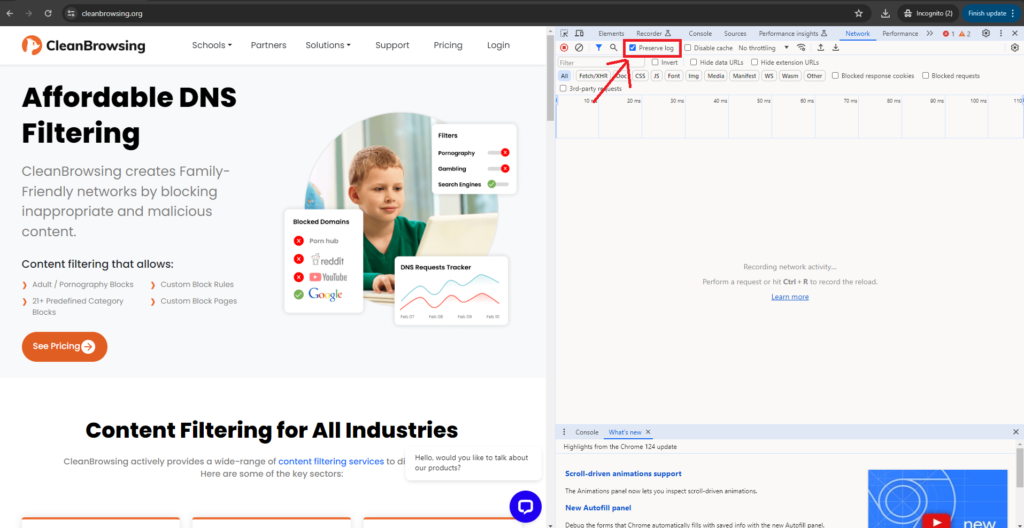
Next you want to make sure logs are being preserved, you do that by selecting the Preserve Log option (disabled by default).
Located here:
Step 4 – Refresh the Page
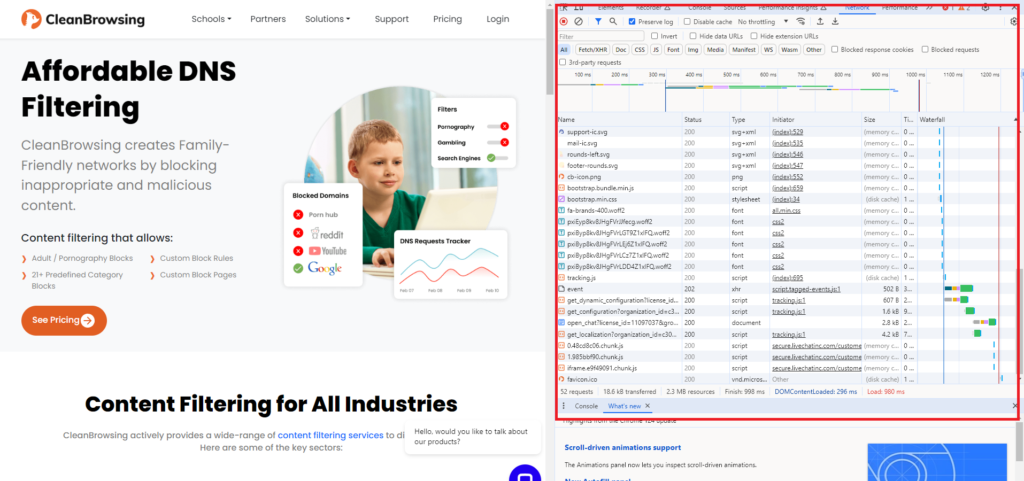
Refresh the page to start capturing requests. It will populate the right pane like this:
Step 5 – Export the File
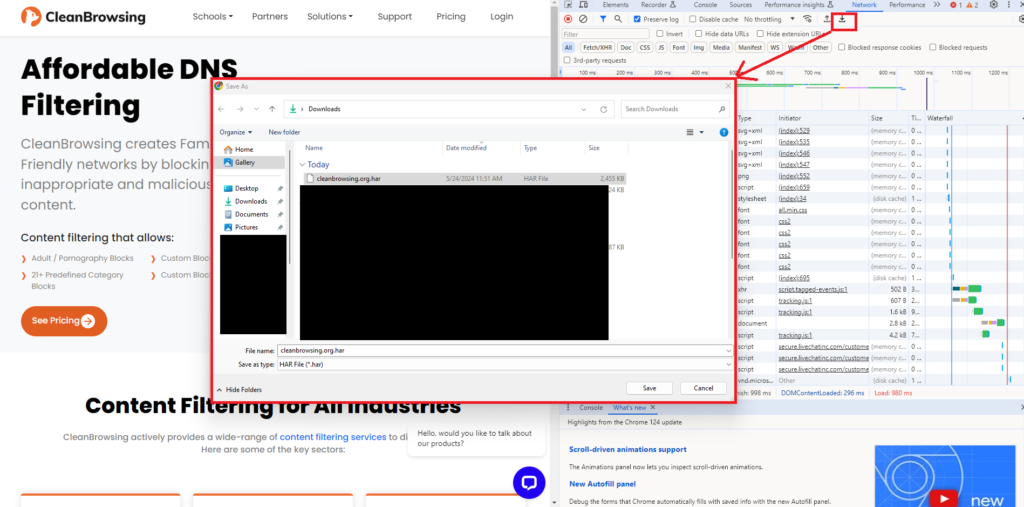
Now export the data and send it to us.
Click the export button and it will download to your local directory, then use your favorite email client to email it to support@cleanbrowsing.org.
