To disable extensions in the browsers you are going to work in something called Windows Registry. You have to be an administrator to make this change. We are also assuming the user is on a Windows 10 machine.
Tech Disclaimer: Modifying your registry can cause catastrophic issues on your machine that might cause system failures that result in rebuilding your computer. We feel confident that if you follow these steps you’ll be safe, but it’s always good to make a backup of the registry before making any changes.
🛡️ CleanBrowsing: Internet Safety Made Simple
Filter harmful websites, block adult content, and protect your entire network. All with fast, privacy-respecting DNS.
Start Filtering Here →The key to getting this to work is to make the update in the right location. It starts with knowing where the registry keys have to go. You will make all the updates here: HKEY_LOCAL_MACHINE\SOFTWARE\Policies\.
You can access the registry by opening RegEdit from your start command:

When you open the registry editor you’ll see a dialog that looks like it is stuck in Windows 95:

It is important you navigate the “Policies” and apply your configurations in this section. If you don’t, the browsers will not acknowledge your registry changes.
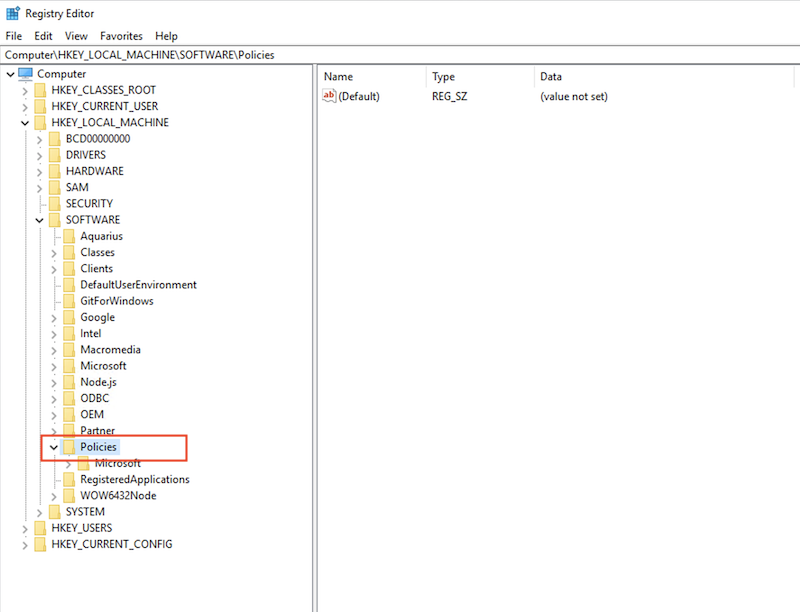
What you see in your policies directory will vary from machine to machine. Those “directories” are actually keys, but to help simplify this guide we’ll refer to them as directories.
You create a new directory by right-clicking Policies and selecting new Key. This will create what looks like the directory above.
With that basic knowledge, let’s disable some browser extensions.
Disabling Chrome Browser Extensions
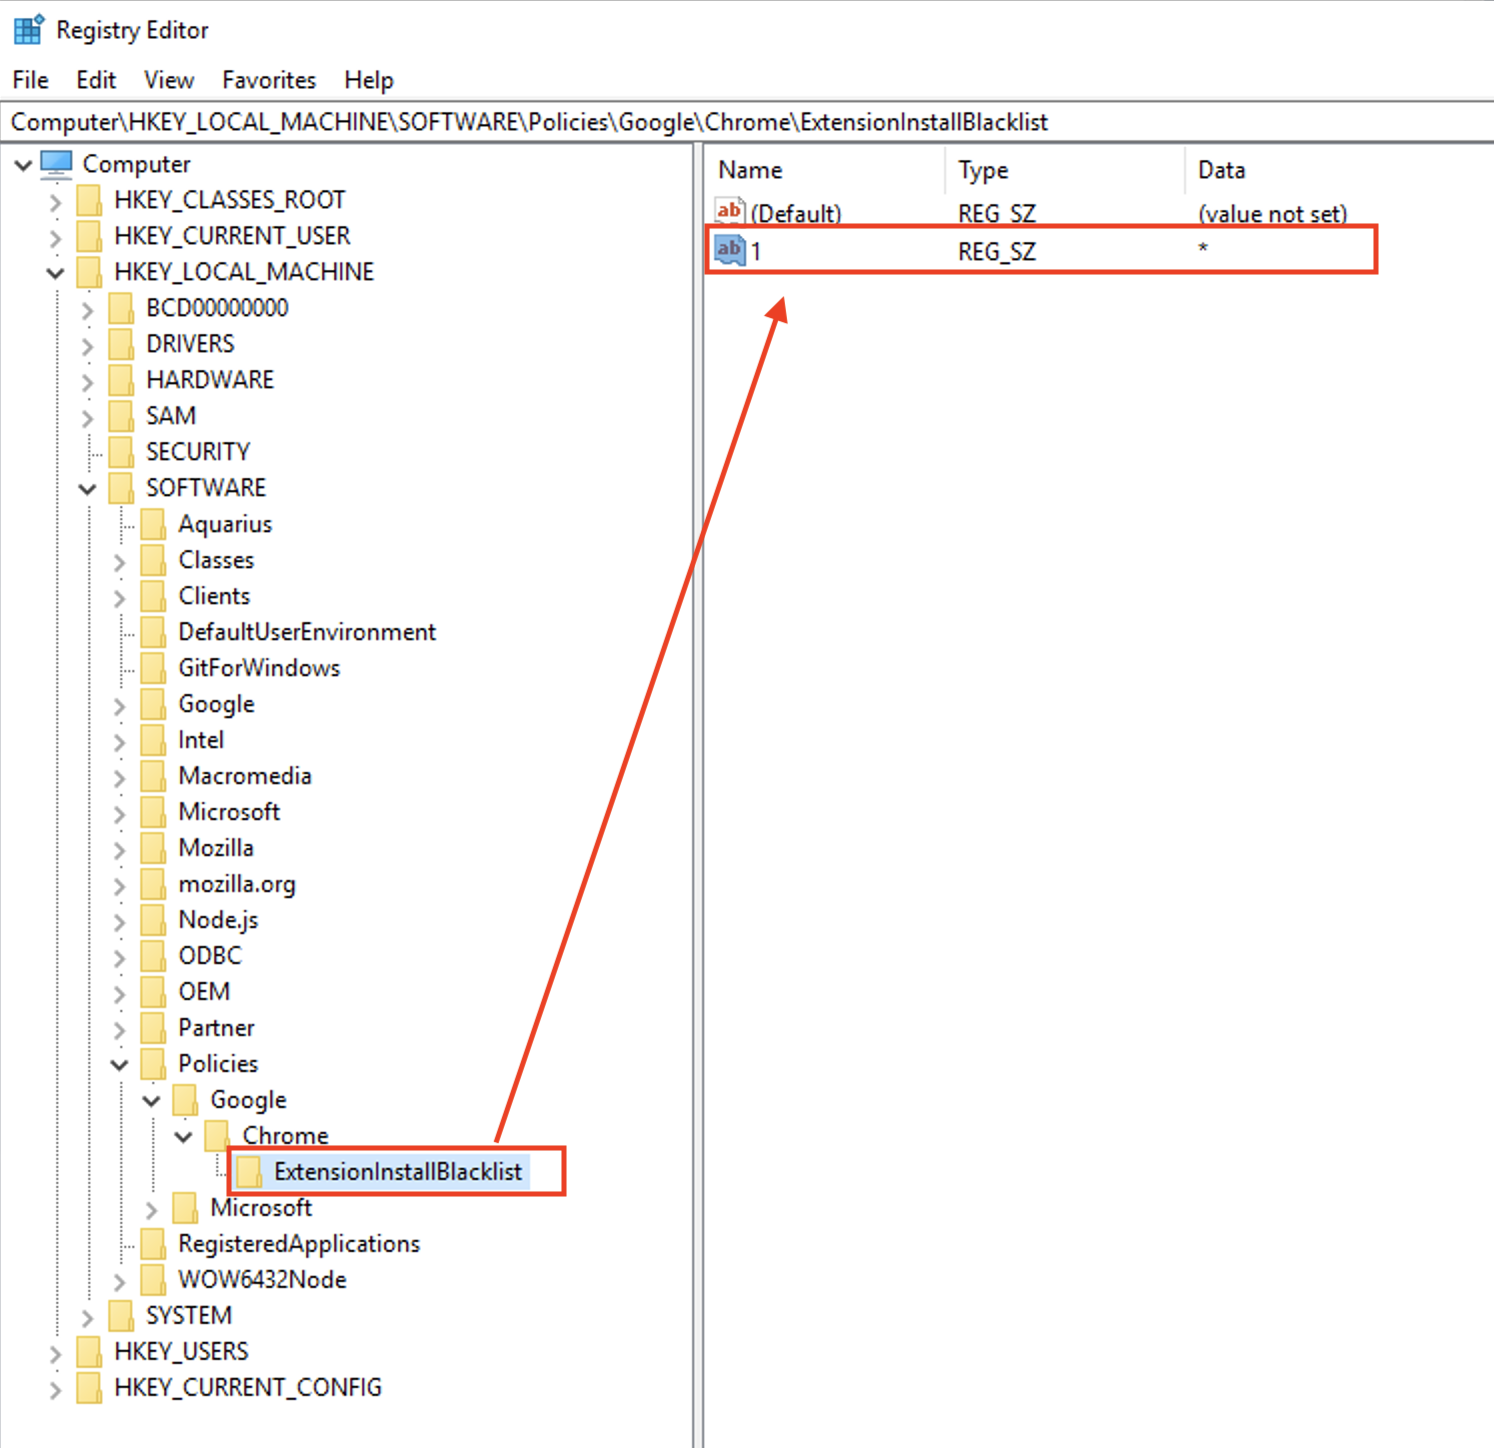
To disable the users ability to disable extensions in Chrome you’re going to leverage the ExtensionInstallBlacklist key and using a string value that has the name “1” and data value of “*”.
By design, you use the ExtensionInstallBlacklist key to disable specific extensions, but it also supports a wildcard value which is what the “*” is.
It will look like this:
Tech Disclaimer: You do not need to reboot the machine after making this change
Open Chrome, and try to install an extension, any extension, it doesn’t matter. You will be greeted with this error:

Disabling Microsoft IE Browser Extensions
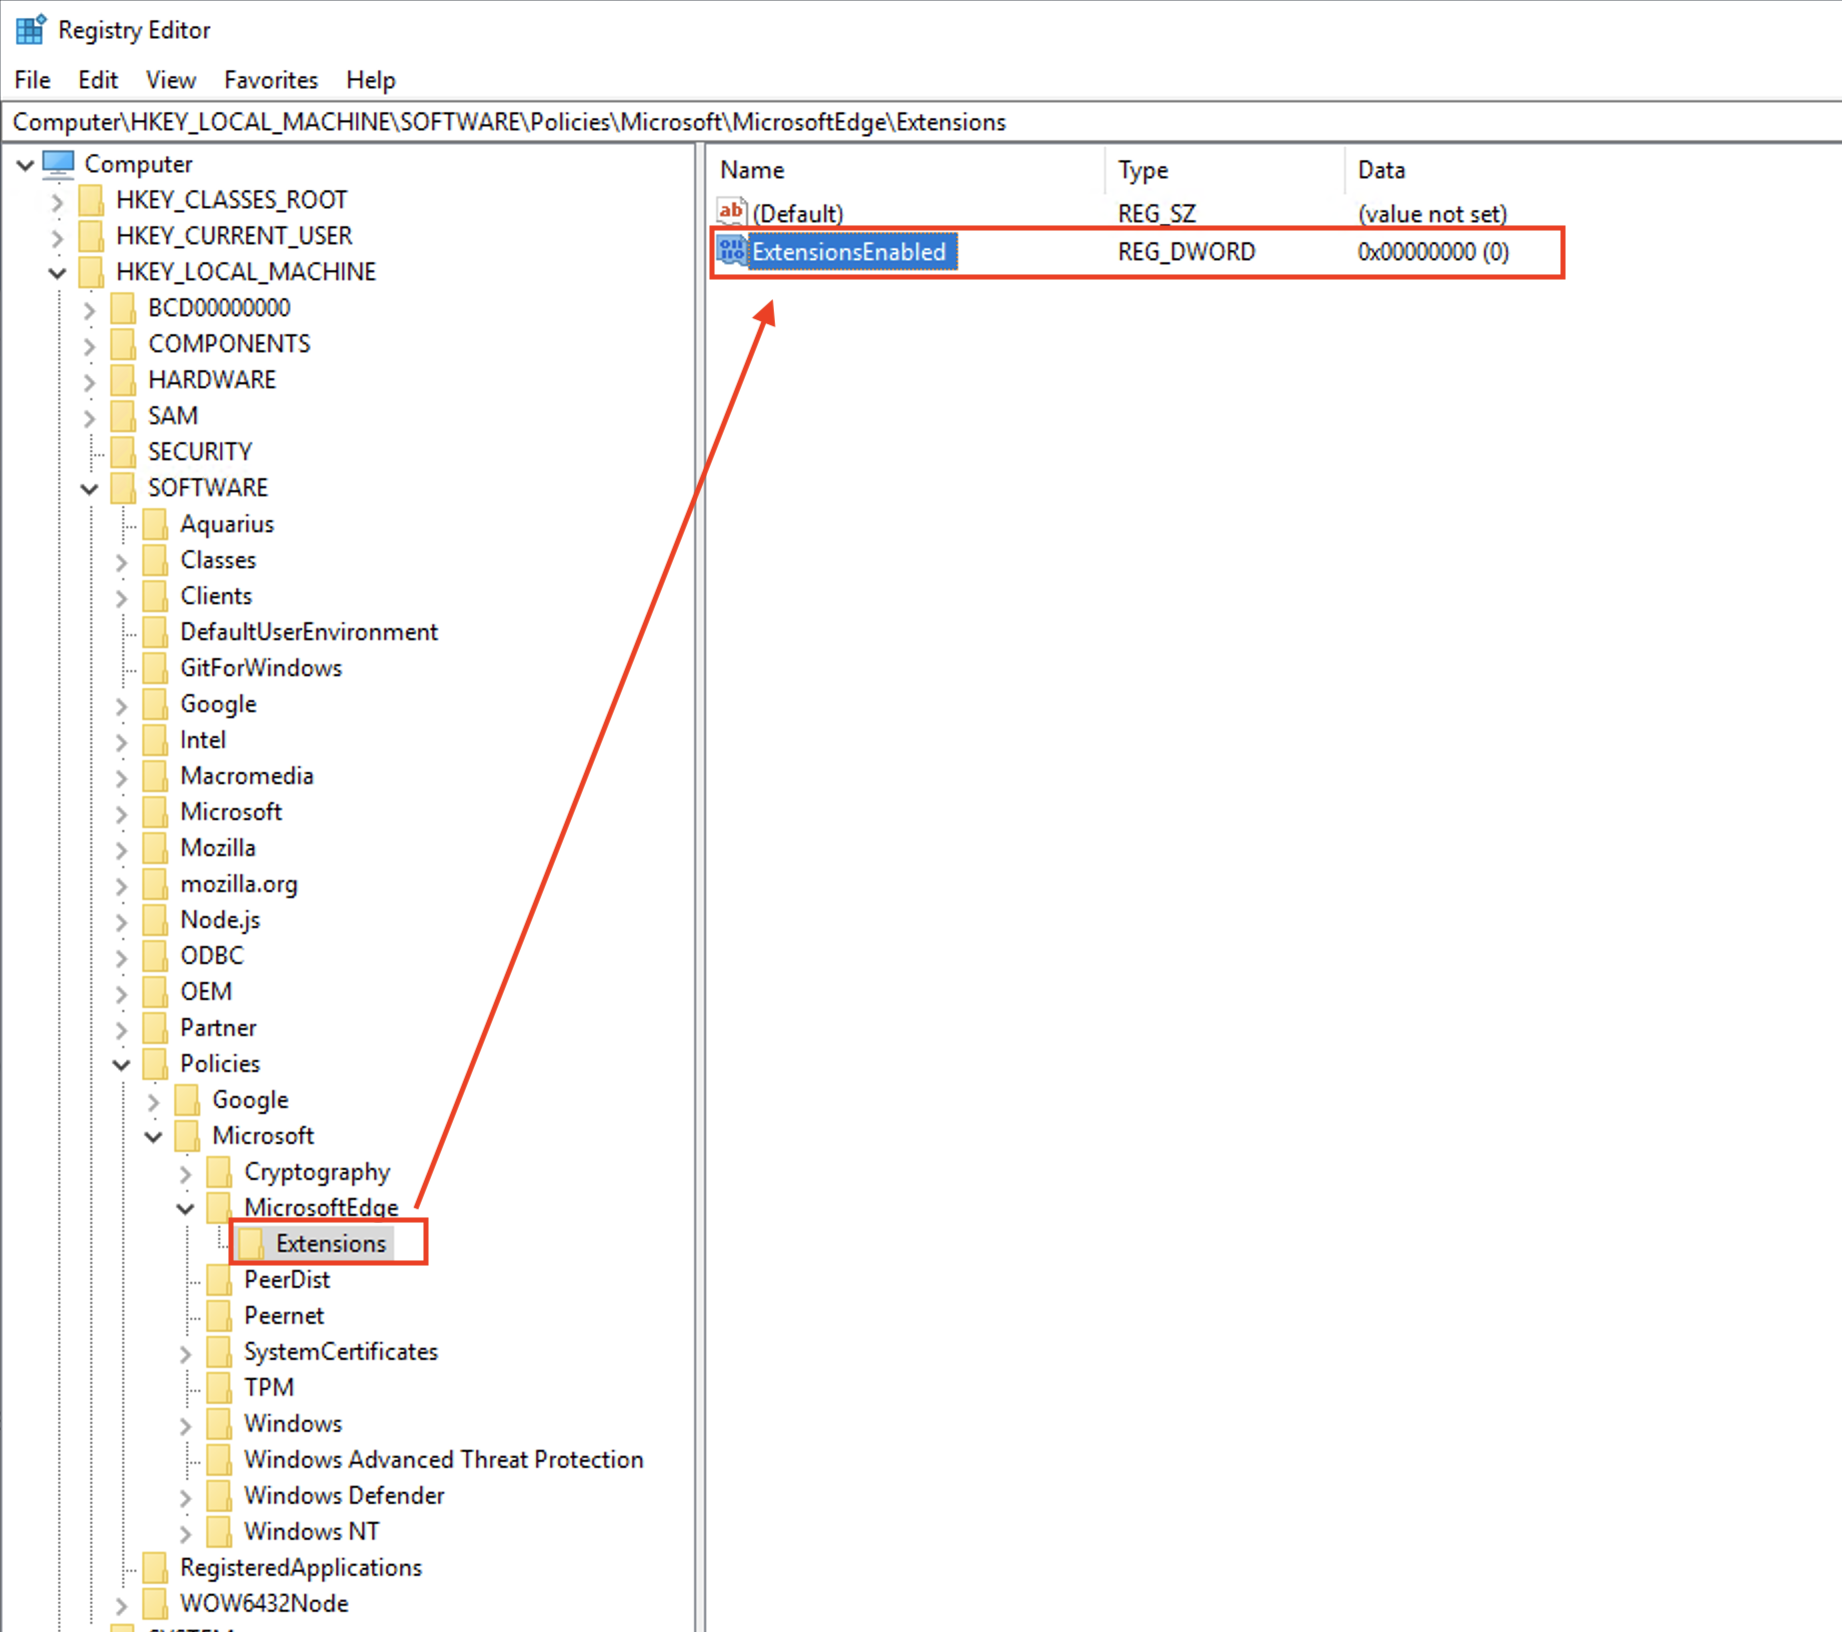
Disabling Microsoft’s IE browser is very similar, but you’ll be using a different key. You will want to create an Extensions key inside of the MicrosoftEdge key. You will create a DWORD attribute with the ExtensionsEnabled value and a data value of 0.
It will look like this:
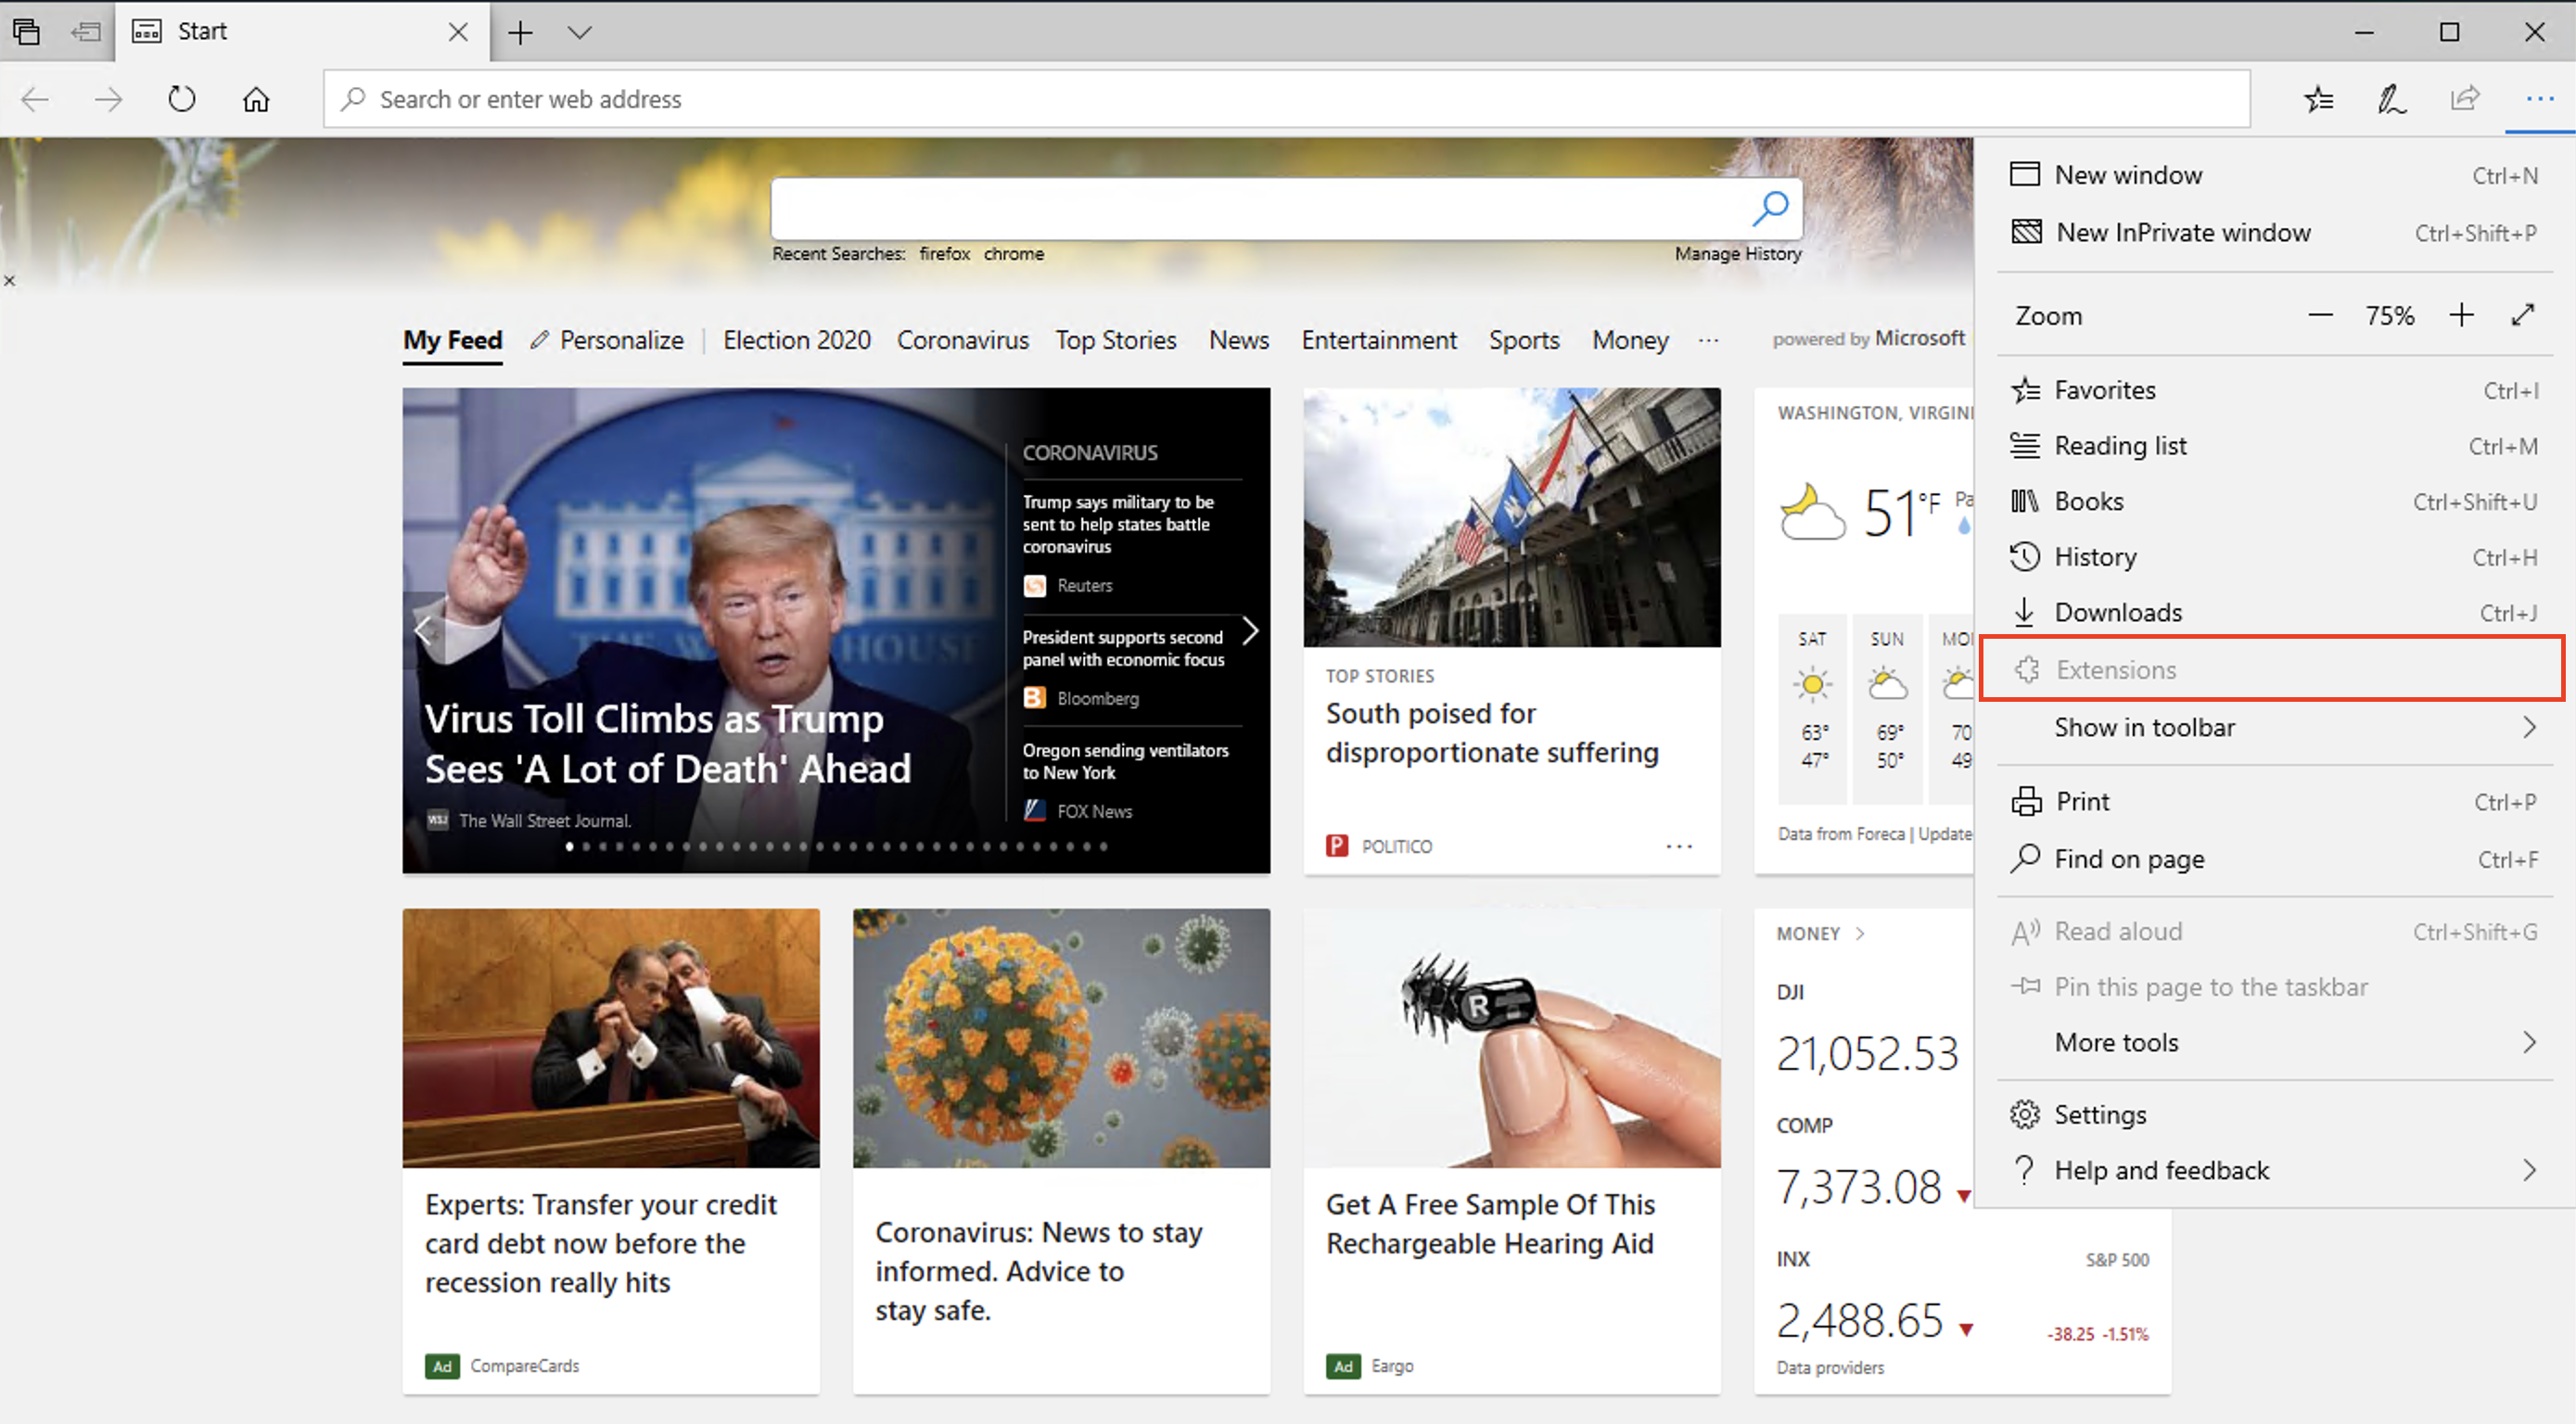
Open Windows IE, and try to install an extension. You’ll notice that the extensions option is now disabled.
Disabling Mozilla Firefox Extensions
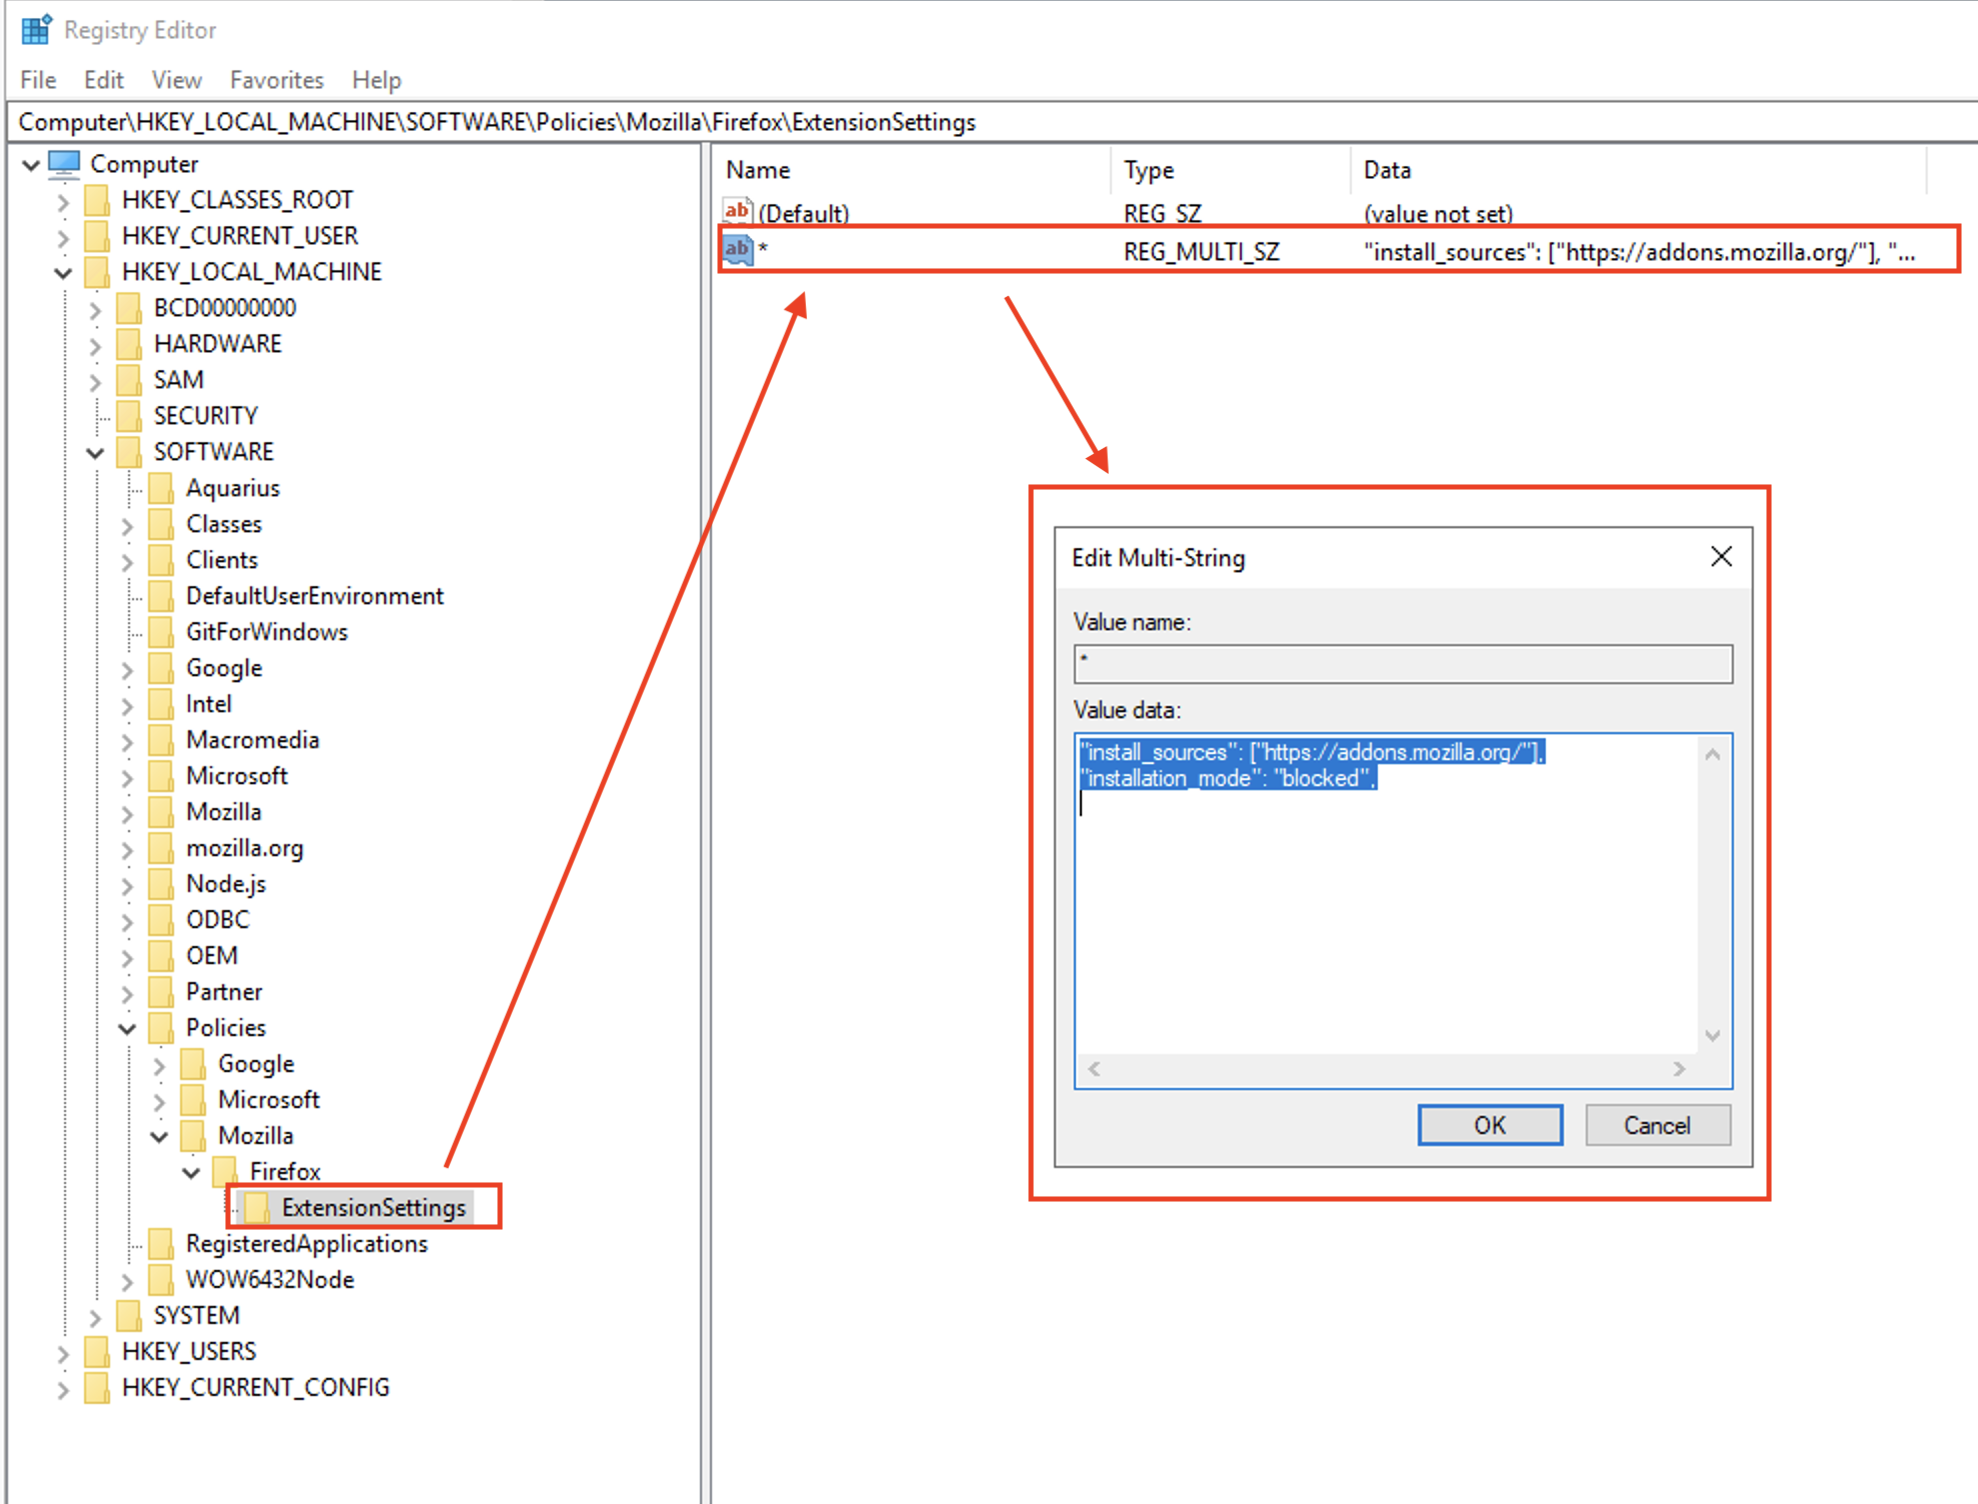
Disabling extensions in Mozilla Firefox browser is a bit different. You will create a ExtensionSettings key inside of a Firefox key, but it will have a multi-string value. The multi-string value will contain two specific attributes: install_source and installation_mode.
You will want these values:
- “install_sources”: [“https://addons.mozilla.org/”],
- “installation_mode”: “blocked”,
It will look like this:
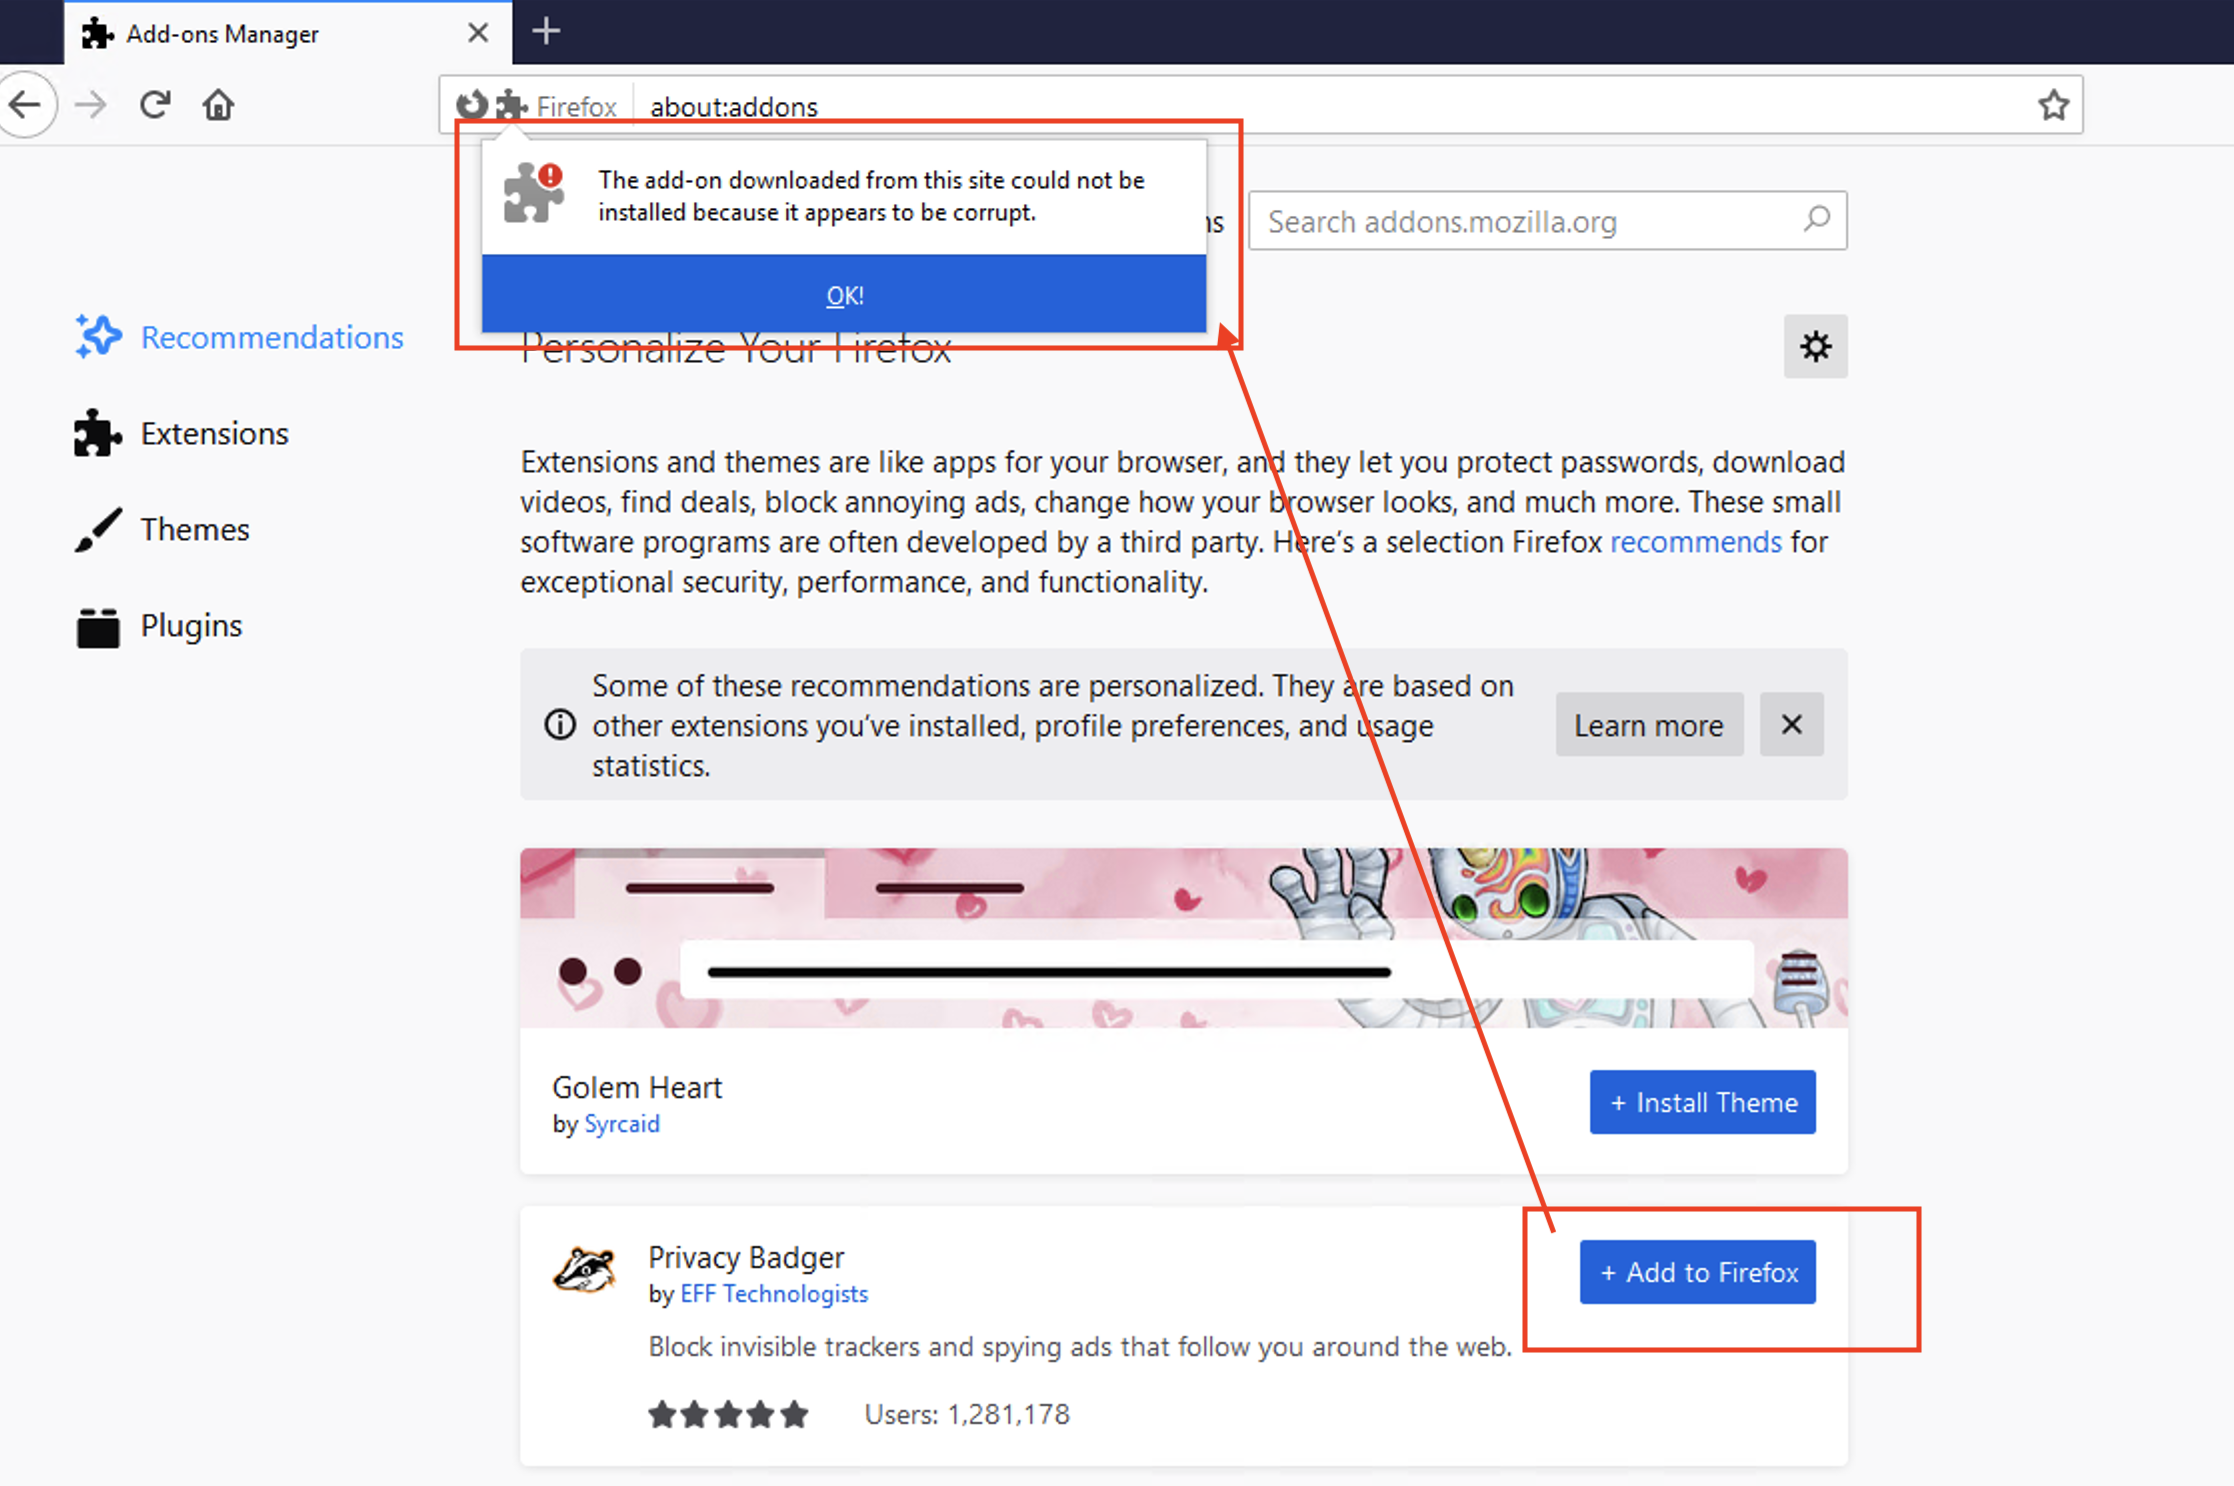
Open Mozilla Firefox, and try to install an add-on. You will be greeted with this error:
Why Disable Browser Extensions?
One of the most effective ways users bypass network controls, kids or employees, is to leverage the features found in the browsers in the form of add-ons and extensions. These add-ons and extensions help extend the browsers capability, introducing things like Virtual Private Networks (VPN) in the name of privacy and in some instances are used as a medium to distribute malicious code (e.g., malware) presenting a potential security risk to your network, users, and family.
Remember, however, that deploying these additional protective controls are useless if you skip step 1 (removing the users administrative rights). The article above is intentionally vague in some areas to help prevent a user from reverse engineering the steps, but in the end if they are an administrator they will be able to undo the configuration.
🚀 Power Your Web Infrastructure with NOC
NOC combines authoritative DNS, a global CDN, and an intelligent WAF into one high-performance platform. Protect your sites, reduce latency, and gain full control over your delivery stack.
Visit NOC →