The leading case of DNS Inactive warnings is a changed Public IP.
Depending on your network, your public IP changes in different intervals. To ensure your network is always up to date we often recommend configuring your environment to account for dynamic IP’s. We have guides that help you with this: Generic or Windows or Mac.
If your public IP does not change often, you have the option to manually update your public IP inside your CleanBrowsing dashboard.
This feature only applies to customers on the paid plan. This does not apply to the Free plans.
Instructions on How to Update Public IP
Step 1: Verify Your Public IP
To verify your public IP you can use the following site: https://dnsleaktest.com/
Focus on the address provided under the Public IP Address section.
Step 2. Confirm Public IP is Set in CleanBrowsing Account
Next, you want to make sure this IP is set inside your CleanBrowsing dashboard.
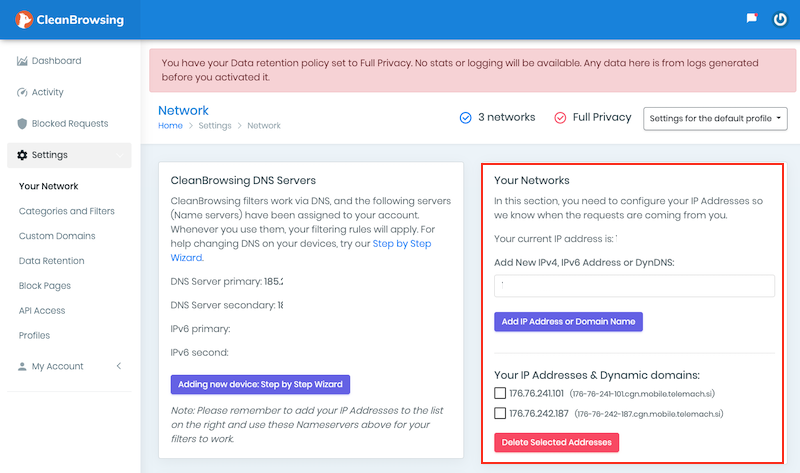
Find this section inside the Your Network settings page.

Notice that in this example, the public IP is already set under Your IP Addresses & Dynamic domains. If it’s not, you simply type it into the input box above and press Add IP Address or Domain Name.
That’s it. Give it about 15 minutes and your DNS should be reactivated.
