IPv6 is the latest internet protocol, its predecessor was IPv4. IPv6 was first introduced in the 90’s in anticipation of the internet running out of IPv4 addresses. The problem, however, has been the slow adoption of IPv6. To this day, even though some devices are defaulting to IPv6 as their main IP communication, many of the devices they connect with (e.g., routers, modems, networks) are not configured to correctly support the new protocol. Yes, depending on your network, and its associated devices, you can experience issues when configuring CleanBrowsing on your local machine or router.
To help with this, we are recommending every day consumers that are not familiar with the specifics of their networks to disable IPv6 by default when configuring CleanBrowsing. Although we do offer IPv6 DNS IP’s, we are noticing many of the commercial routers do not effectively support the protocol.
Confirm IPv6 is the Prioritized on Windows
An easy way to verify if IPv6 is the prioritized protocol on your machine is to run the nslookup command.
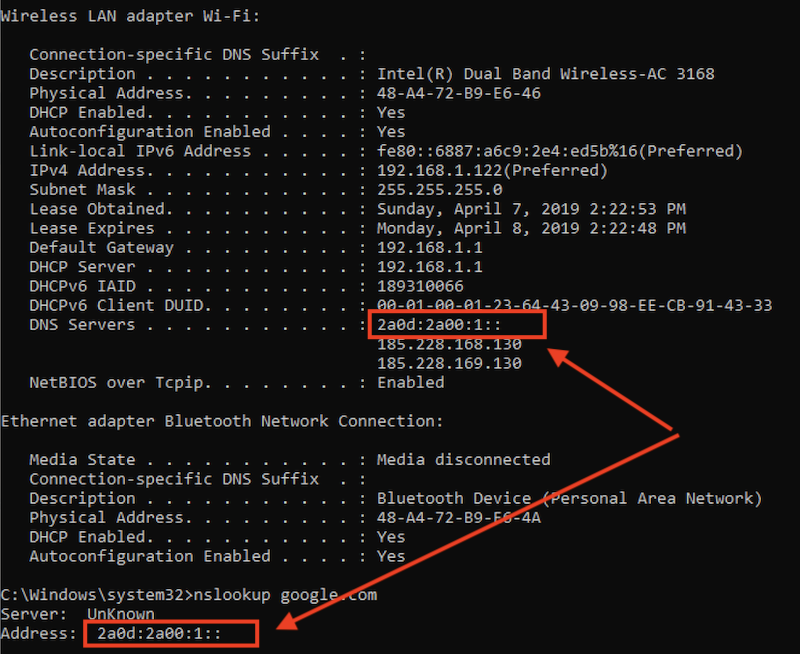
The highlighted section show that IPv6 has been set on the device, and it’s the preferred DNS IP when you look up a domain. If you see this, and the filters are not working, the following guide will help you disable IPv6.
How to Disable IPv6 on Windows
Whether you are on Windows XP, Vista, 7, 8 or 10, the steps are similar. Some of the images might look different, but the functionality exists, you might need to right-click or scroll in the panels to find the exact settings.
Step 1. Network and Sharing Center
The first thing you want to do is find your way to the Network and Sharing center. You can do this by running a search after clicking start, or you can right right clickon the network icon on your windows desktop, then select Open Network and Sharing Center.

Step 2. Change Adapter Settings
Second, you want to change the Adapter Settings. 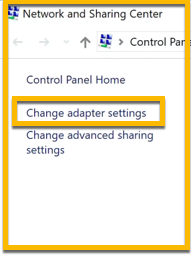
Next, right click on the network adapter you are looking to change and then select Properties. 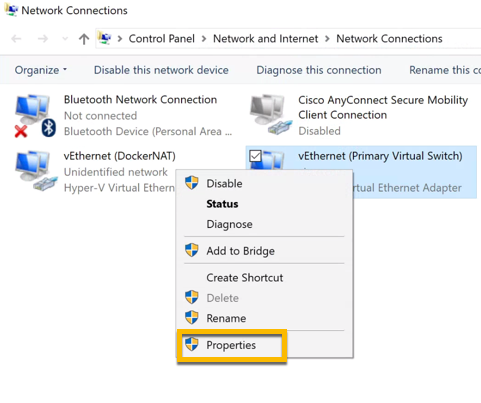
Step 3. Disable IPv6
The final step is to disable IPv6.
Scroll to where it says Internet Protocol Version 6 (TCP/IPv6), uncheck the box next to the words. Click OK.
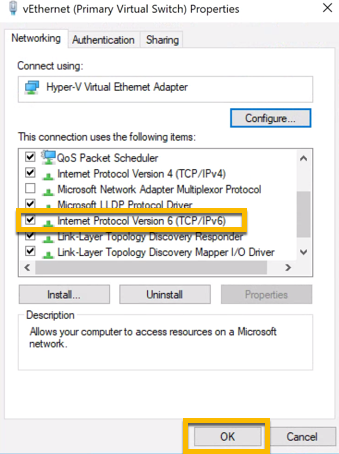
That’s it. IPv6 is now disabled and you should be able to proceed with your CleanBrowsing configuration.
Step 4. Confirm IPv6 is Disabled
Although you can see IPv6 disabled in your adapter settings you might want to confirm the configuration. You can do this using the same nslookup command as the one provided above. This time, the output should be different. 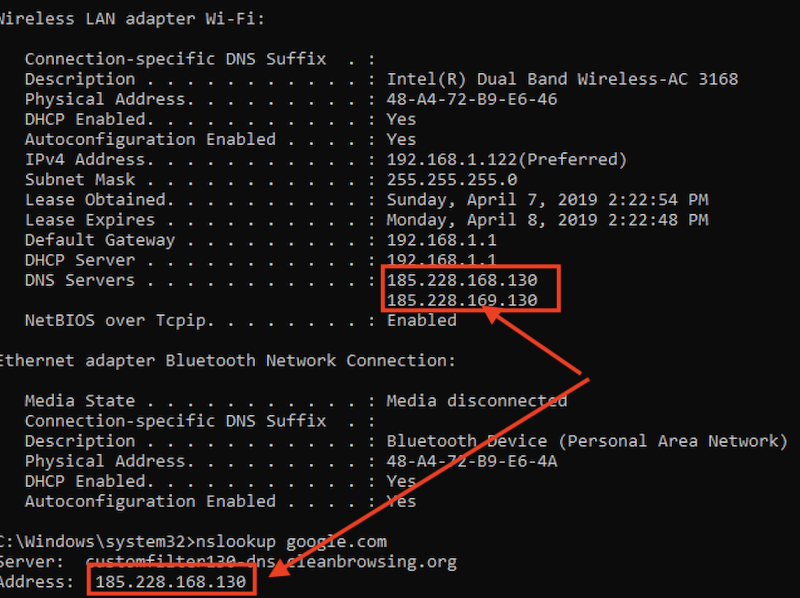
What you’ll notice is that now the local DNS is using IPv4 addresses, and the response on the nslookup is IPv4. This is a good indicator that things are now working correctly.
