DNSCrypt is a protocol that authenticates communications between a DNS client and a DNS resolver. It is specifically helpful if you are having issues with your Internet Service Provider (ISP) hijacking DNS requests. When DNS requests are hijacked a user is unable to define their preferred DNS resolvers, this means that your local settings are not respected and your DNS is routed to the networks preferred resolver.
Unlike traditional DNS that sends requests over port53, DNSCrypt can use UDP or TCP transport protocols and traverses over port443. Yes, the same ports as your secure web traffic (i.e., HTTPS). By leveraging port 443, traditional means of DNS hijacking can be bypassed.
If you are not allowed to set your DNS resolver of choice, DNSCrypt can help. At CleanBrowsing we support DNSCrypt with all of our Free and Paid filters. Unfortunately, there are a few additional steps you’ll have to take, and this guide will help you get configured.
Configuring CleanBrowsing with DNSCrypt on a Windows Machine
This guide will be specific to Windows Operating Systems (OS). If you operate a MAC or Linux machine another guide will be shared soon.
For Windows machines, we are going to use the Simple DNSCrypt tool. This tool provides you a Windows installer that helps simplify the process.
Step 1. Install Simple DNSCrypt
The first step is to install Simple DNSCrypt. On the home page of Simple DNSCrypt choose the appropriate installer for your machine (e.g., 64 or 32 bit machines).
Once the installer is downloaded, open the file and run the executable (MSI file). There should be four pages: Welcome > Configure Shortcuts > Select Installation Folder > Ready to Install. Leave the default options on each panel, click install.
It will ask you: Do you want to allow this app to make changes to your device? Select, Yes.
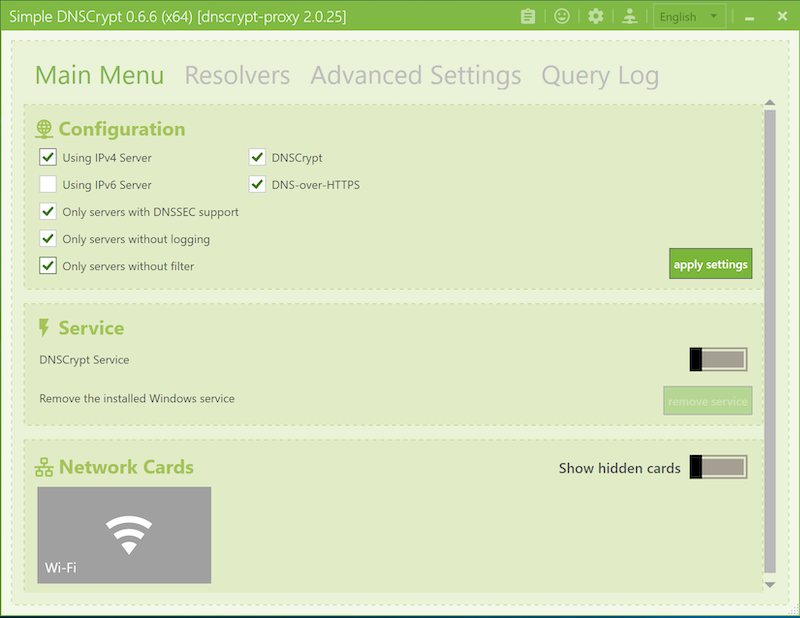
Post-installation it should kick off the application, and will look something like this
Step 2. Configure Simple DNSCrypt
When you first install Simple DNSCrypt you won’t see the CleanBrowsing filters. You have to unselect the Only servers without filter and Only Servers without filter. Remember, the CleanBrowsing service is providing free resolvers that do help you filter out malicious or adult content.
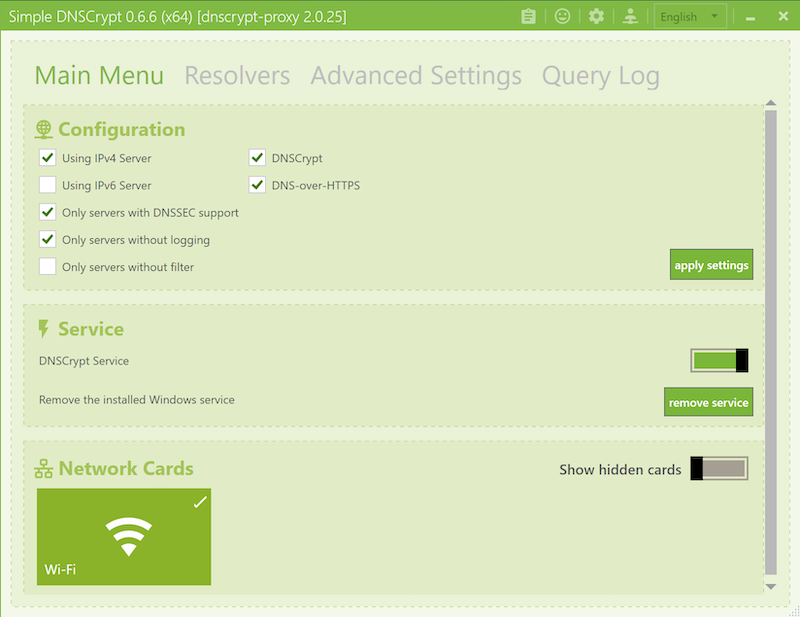
Next you want to start the DNSCrypt Service and select the appropriate Network Card. In this example, I’m on WiFi and have selected the Wi-FI network. When you start the service, the toggle in the Service section will be green (i.e., enabled) and the the network card will be green with a check.
It will look something like this:
Now, you want to select the appropriate filter to use.
Click on the Resolvers navigation menu.
Make sure that the toggle is off (grey) in the DNSCrypt Mode section. If it’s enabled it’ll always look through all the available resolvers.
Scroll through the list of resolvers until you find the CleanBrowsing options. They will all have cleanbrowing in the title, and the filter name will be included (e.g., Security, Adult, and Family).
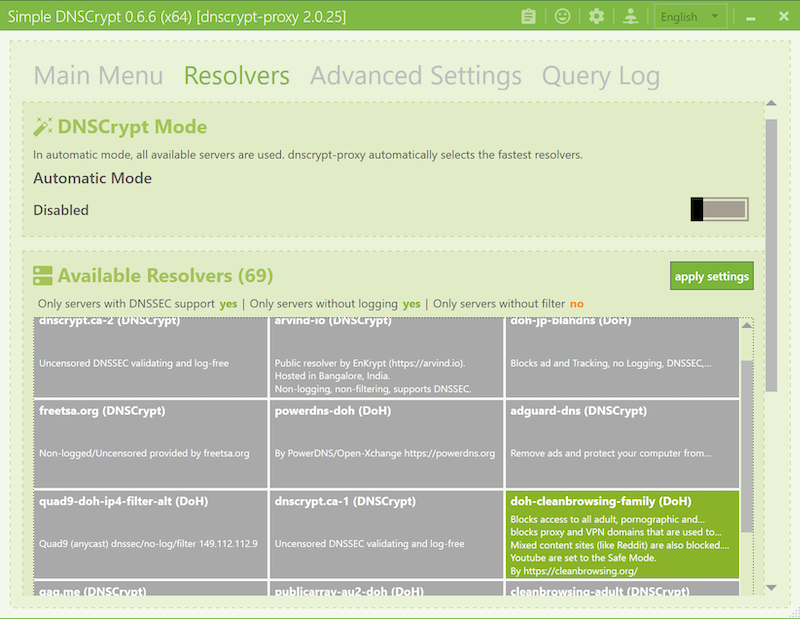
Click apply settings.
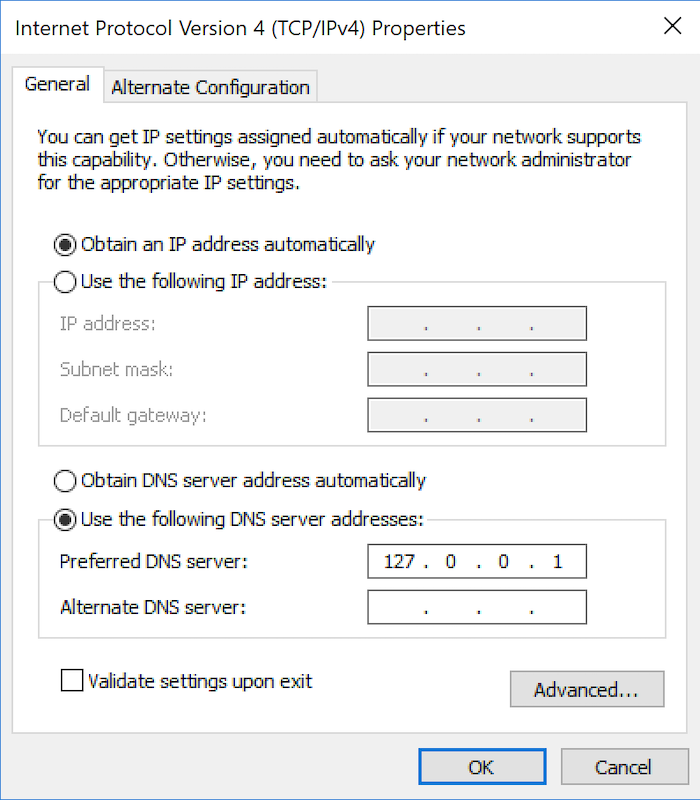
All traffic is now routing through DNSCrypt. You will notice that when you look at your network settings all traffic is being routed to your localhost on port 53, this is expected.
Step 3. Configure Paid Account with Simple DNSCrypt
If you have a paid account you will have to take a few additional steps to configure your specific filters.
Go to Settings->Network in your dashboard and look for the DNS Encryption subsection:
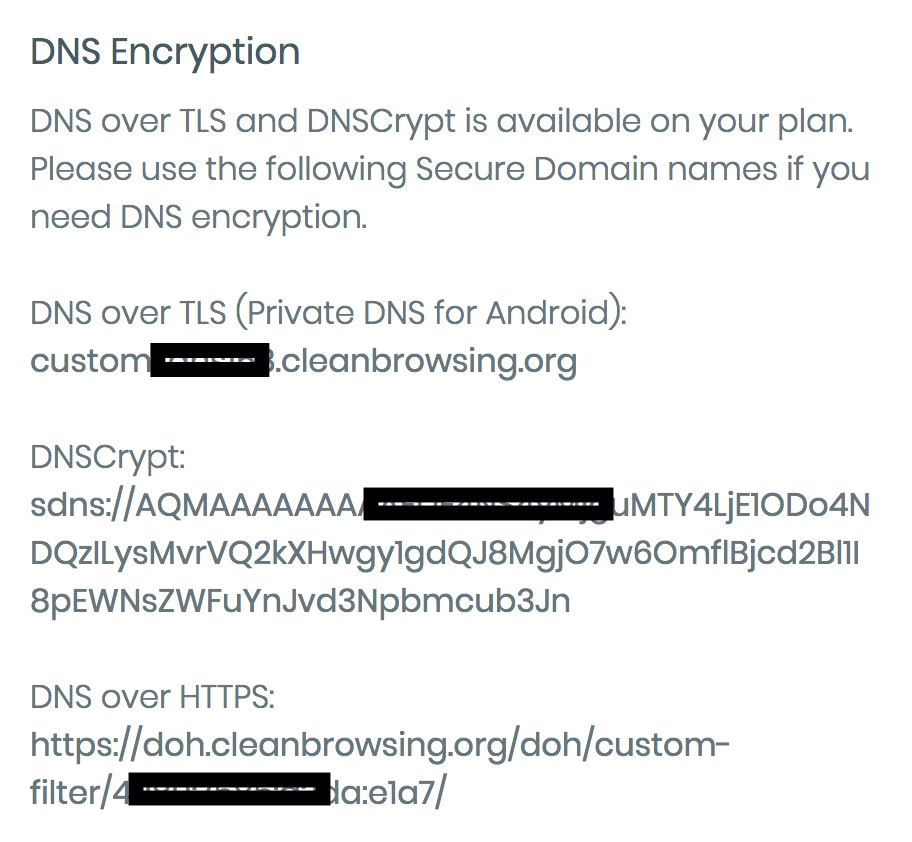
You will find the SDNS stamp that you can use to connect to our DNSCrypt server via DNSCrypt-proxy, DNSCloak or any other software that supports it.
Navigate to the installation directory for Simple DNSCrypt. If you left the default location, you will find it here: C:\Program Files\bitbeans\Simple DNSCrypt x64\dnscrypt-proxy.
Open your Notepad application as an administrator. This is critical, it will allow you to save the file only as an administrator
Open the dnscrypt-proxy.toml file in your notepad application.
Scroll to the bottom where it says [sources] and add the following:
    [static.'custom-cleanbrowsing']
    stamp='sdns://[your key from your dashboard]
The DNSCrypt key is found on this page in your account: https://my.cleanbrowsing.org/dashboard?page=settings&subpage=network.
At the top, where it says: server_names update it to read:
server_names = ["custom-cleanbrowsing"]
Close and safe the file to retain the edits. Because you are in your notepad application you have to choose the .toml extension when saving. Yes, choose to override the existing file.
To apply the change, open the Simple DNSCrypt application and restart the service on the Main Menu.
Once the service is restarted all traffic will start routing to your custom profile. You can follow this guide to confirm if the DNS is configured correctly.
