What most administrators don’t realize is that by “default” what you can control on the Apple iOS devices is very limited out of the box. Large enterprises get around this by using Mobile Device Management (MDM) platforms, like Mosyle.
Unfortunately, the idea of an MDM for smaller organizations limited with funding, individuals or non-profits is not within reach. The good news is there is an alternative, and it’s the same technology that these MDM’s are built on – Apple Configurator.
🛡️ CleanBrowsing: Internet Safety Made Simple
Filter harmful websites, block adult content, and protect your entire network. All with fast, privacy-respecting DNS.
Start Filtering Here →As the name implies, the Apple Configurator allows you to enable and disable features you might otherwise be unfamiliar with. For instance, if you want to disable the ability to use a VPN on a device, this is the best way to do it. Or maybe limit what a user can do in their network settings, this is where you would do it.
Additionally, you will want another tool – iMazing Profile Editor. This is going to allow you to make changes to existing profiles, which will be important when you download the profile we issue you in our dashboard.
Supervised vs Unsupervised Mode
Before you begin, let’s take a minute to touch on the differences of Supervised vs Unsupervised Mode. Unsupervised mode gives you limited control, while Supervised mode gives you full control. We recommend supervised mode where possible, but below is a table to help think through the differences:
| Supervised Devices | Unsupervised Devices |
|---|---|
| Devices can be protected against Factory Reset | Devices can be Factory Reset anytime |
| Airdrop can be restricted | Airdrop cannot be restricted |
| Individual Apple iDs not needed for enrollment | Each device needs an Apple iD for enrollment |
| Unenrollment from MDM is not possible | Unenrollment from MDM is possible |
| Silent App installation is possible | App installation requires user confirmation |
| Web content can be filtered | Web content cannot be filtered |
| App notifications can be controlled | App notifications cannot be filtered |
| The device can be run in Kiosk mode | The device cannot be run in Kiosk mode |
| TouchID can be restricted | TouchID cannot be restricted |
| iMessage can be restricted | iMessage cannot be restricted |
| Screentime can be restricted | Screentime cannot be restricted |
| Homescreen wallpaper and lock screen message can be configured by Admin | User can customize Homescreen wallpaper and lock screen message |
| Global HTTP Proxy can be configured | Global HTTP Proxy cannot be configured |
| Game Center Access can be controlled | Game Center Access cannot be controlled |
How To Configure iOS Devices in Supervised Mode
Special thanks to our customer and user Jared for sharing updates to the configuration process.
Step 1: Configure iOS Device in Supervised Mode
The following steps can be used with any iOS device. Follow these steps to put the device into supervised mode:
1 – Start Apple Configurator
2 – Plug the device you want to manage using your USB / USB – C cable to the device with Apple Configurator installed
3 – From the Action menu, choose prepare
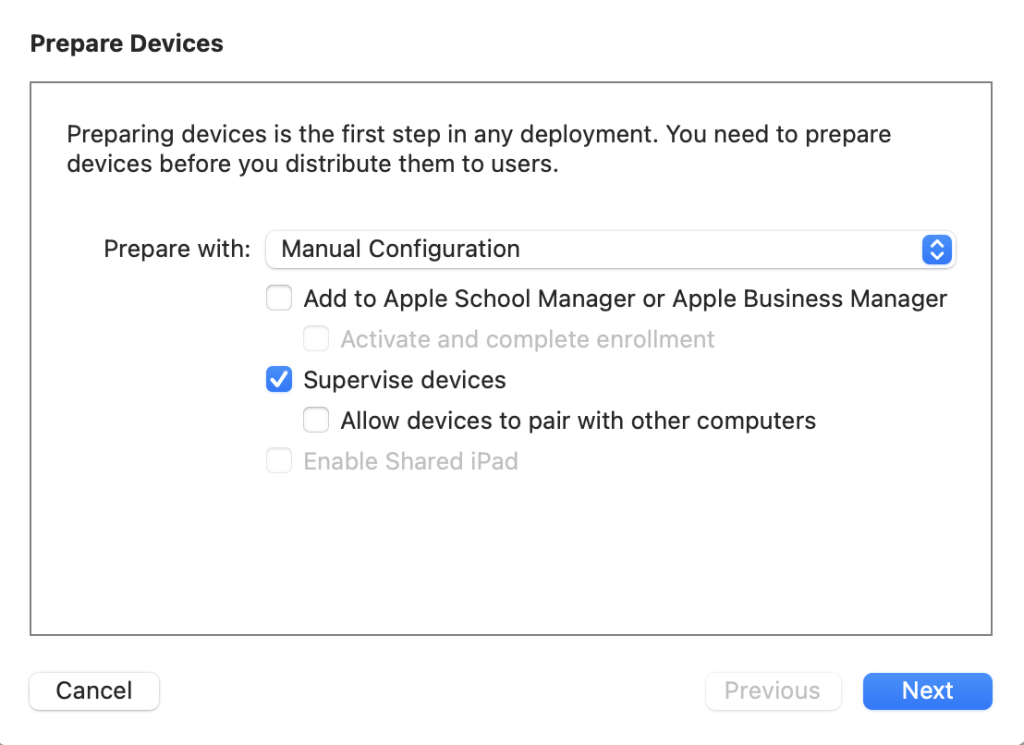
4 – Prepare with “Manual Enrollment” and make sure “Supervise Devices” is selected. Next (Note: This step will erase the connected phone)
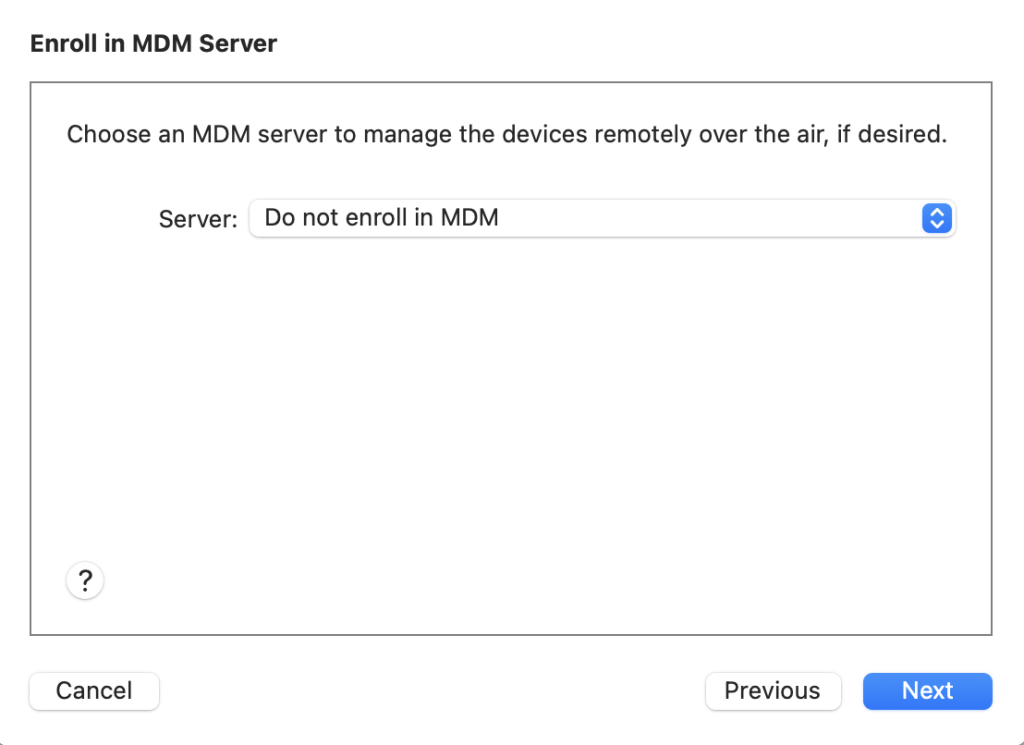
5 – Do not enroll in MDM, Next.
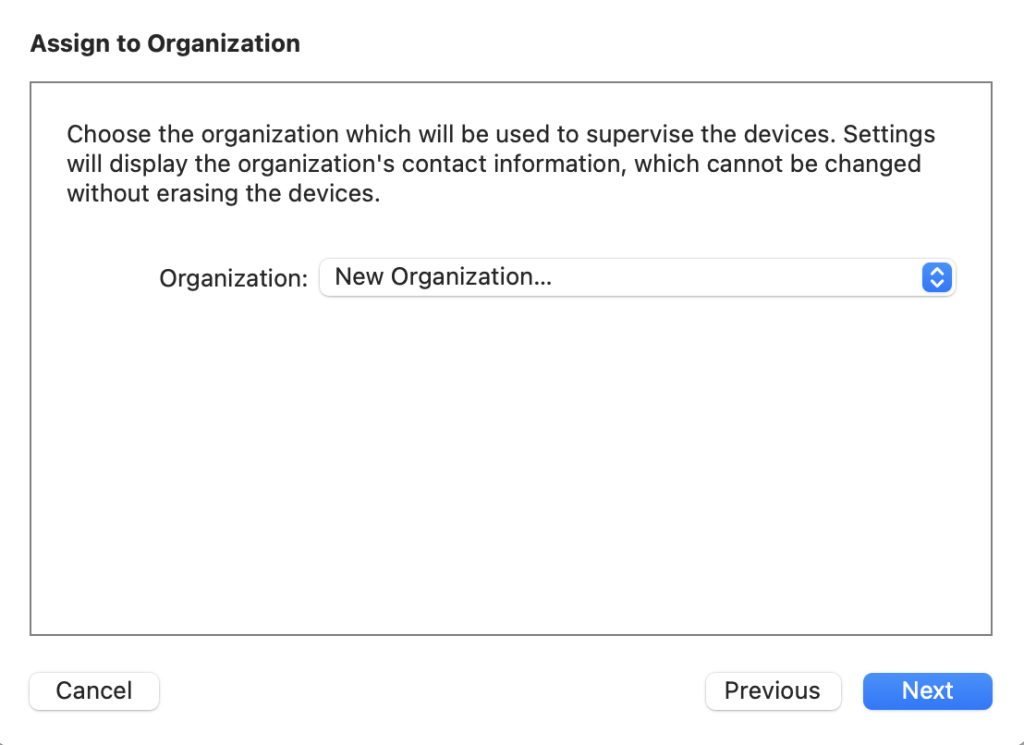
6 – Create an organization (name it whatever you like). The name you select will appear on the phone as “This phone is managed by … [organization name]”
7 – IMPORTANT: When setting up the phone, DO NOT restore your phone, instead set it up as a new device. If you restore from a backup, the phone will no longer be a “supervised device”
Step 2: Configure The CleanBrowsing Profile
Once the device has been set to supervised mode you can deploy the CleanBrowsing profile.
1 – Log into your CleanBrowsing Dashboard: https://my.cleanbrowsing.org/login
2 – Navigate to the “your network” page: https://my.cleanbrowsing.org/dashboard?page=settings&subpage=network
3 – Choose the profile you’d like to work with.
4 – Navigate to CleanBrowsing DNS Servers section
5 – You will find two options, both are designed for iOS devices. The iOS Mobile Config file uses DOH and the iOS Mobile Config for T-mobile uses DOT. Both should work, some networks however require a DOT configuration. Download the files locally on the device with your Apple Configurator installed.

6 – Open the downloaded mobile.config file in iMazing Profile Editor
7 – In the left nav of iMazing Profile Editor choose “DNS Settings”
8 – In the main pane for those DNS settings, scroll all the way to the bottom of the scren and select “Prohibit Disablement”
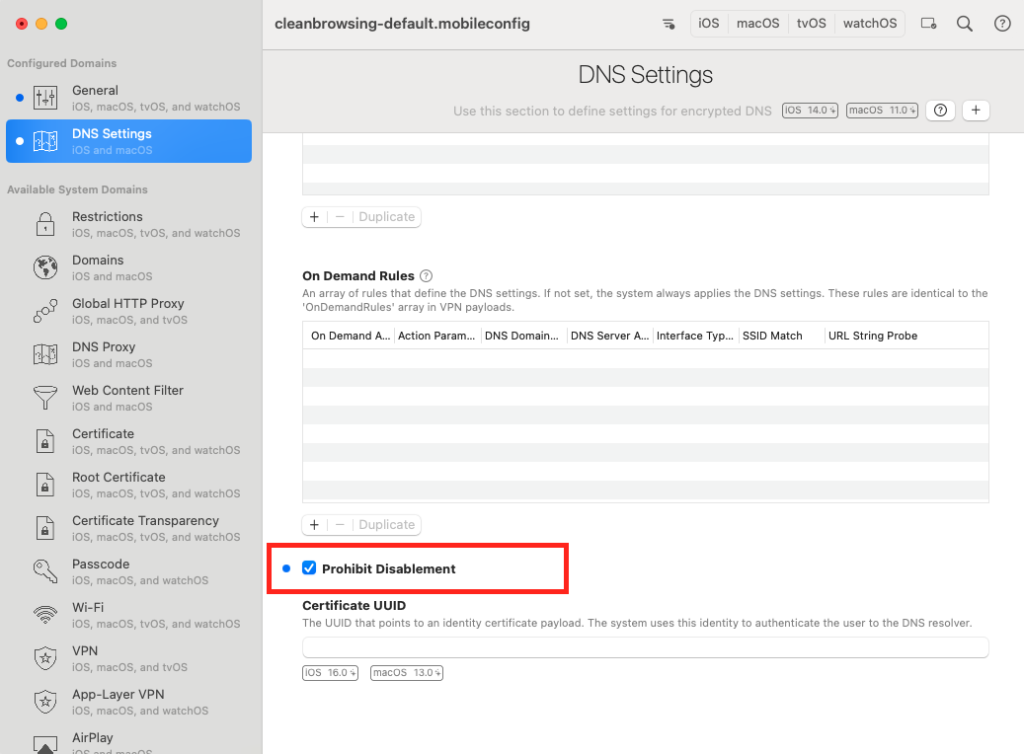
9 – File > Save to save your changes
Note: You can also create additional profiles for other restrictions, like disabling find my friends, etc. There are many settings under the “Restrictions” tab which you can set-up and provides much more fine grained control than standard “Screen Time settings”. You can also have as many profiles as you like. For example, one generic kids profile with set restrictions to put on all devices and then an additional clean browsing profile for network specific restrictions.
Step 3: Deploy the CleanBrowsing Profile on iOS Device
Now that you have the device in supervised mode and you have updated the CB profile to prohibit it from being removed, you can proceed to pushing the profile to your device[s].
1 – With the managed device still plugged in open Apple Configurator
2 – If the device has been properly configured, it should appear under the “Supervised Tab”

3 – Double click the device (i.e., the big phone in the main screen) to open and edit it
4 – Choose the profiles tab from the right pane
5 – From the menu bar, choose Add, then profile, then select the CleanBrowsing profile that was updated
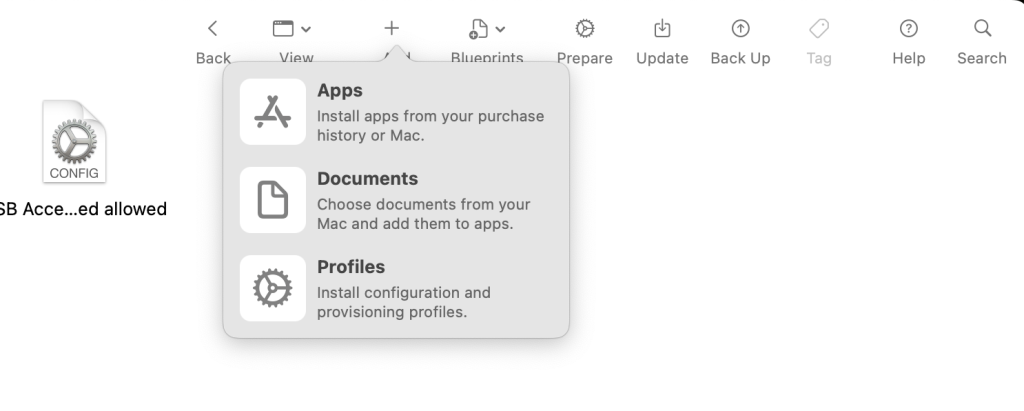
6 – Disconnect the device and verify that it is all working. You should see three things:
a) Under Setting at the top it should say “This iPhone is supervised and managed by…”
b) Under Settings > General > VPN & Device Management when you click on the CleanBrowsing profile there should not be a button to “Remove the Profile”
c) Under Settings > General > VPN & Device Management. When you click on the DNS restrictions, only CleanBrowsing should be allowed. You should not be able to select “automatic
Frequently Asked Questions
Q. What if I already have applications and data on my iPad? Can I back up my iPad, prepare the iPad in Supervised Mode, and then restore my iPad from backup?
Sadly, no. It is not clear to me whether this is intentional on the part of Apple, or a bug, but the process of restoring the iPad from the [unsupervised] backup undoes Supervised Mode. This does work, however, if you restore to another [supervised] iPad (that is, a different iPad than the iPad on which you performed the backup). This is workable if you have two or more iPads to work with.
Q. Can I do this without a Mac?
No, Apple Configurator 2 is only available for the Mac.
Q. How is Supervised Mode better?
You can enable certain features in Apple Configurator that cannot be defeated easily. Single App Mode, under Actions > Advanced, for example, is very similar to Guided Access, however, it cannot be defeated by a user simply draining the battery of the iPad and restarting.
You can do many additional things with Profiles, similar to how enterprises manage their iPads.
🔍 Investigate DNS like a Pro with DNSArchive
Uncover historical DNS records, IP reputation data, and web metadata with one powerful tool. Built for threat hunters, researchers, and digital forensics teams.
Explore DNSArchive →