If you’re working with spectrum you might need to make your changes via the Spectrum App or router. This article will focus on the router via the RAC2V1K router with Firmware 1.2.4.
1 – Access the Router
By default, spectrum routers are typically accessed here: 192.168.1.1. But it can be any variation of this private IP, we have an article here to help.
2 – Navigate to IPv4 DNS Section
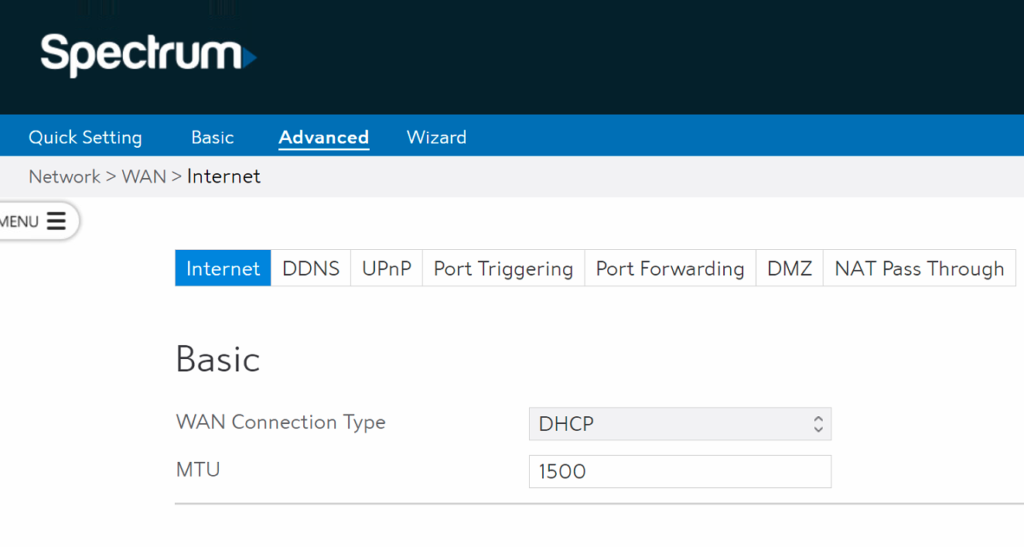
First, you want to navigate to the DNS Section for IPv4. Do this by clicking on “Advanced” in the main navigation screen.
This will drop you on the Internet tab by default.

Scroll down to the DNS section in this tab. Here, they have this very weird phrasing “Connect to DNS Server”. What they actually mean, is do you want to use the ISP DNS Server, or your own?
Select, “NO” and that should make the input boxes editable like the image below:

Click Apply.
3 – Update IPv6 DNS Values
We’ve noticed that with Spectrum specifically, they are starting push IPv6 by default in some regions. This means that if you only update IPv4 values on your router, your traffic will likely be split between IPv4 and IPv6. This creates this idea of a DNS leak which means that sometimes you hit the IPv4 DNS server or the IPv6 DNS Server.
To address this, we recommend updating IPv6.
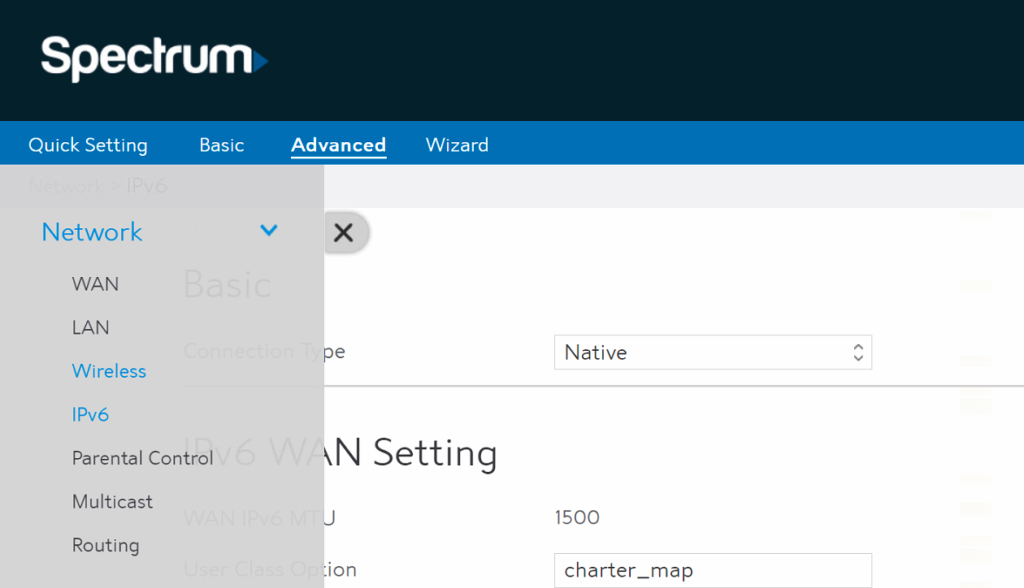
Do this by clicking on the “menu” toggle on the left hand side. This will bring up this screen:

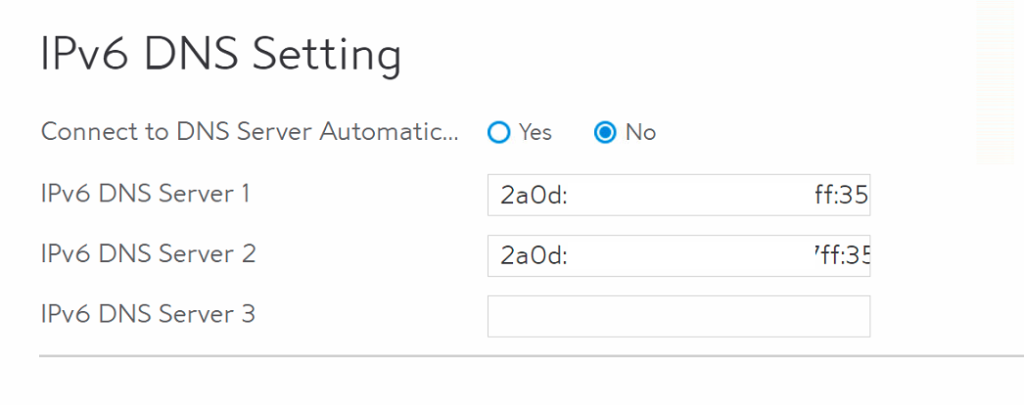
From there, click on “IPv6” and look for the IPv6 DNS Settings. By default, it will be set to YES and you will not see the DNS Server input boxes.
Click “No” and the input boxes will appear. Add the IPv6 values we provide like this:

Click Apply.
Final Step: Verify Configuration
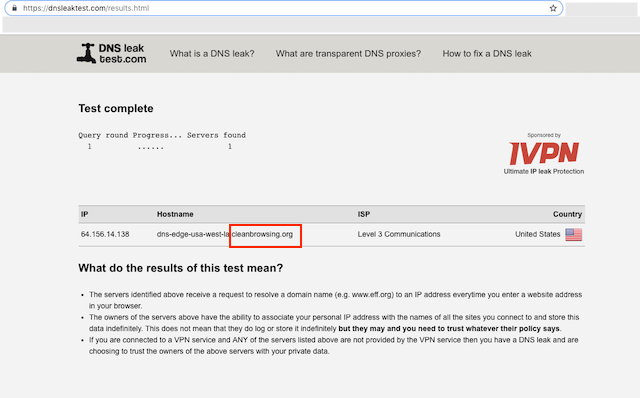
The final step is to verify the DNS configuration is working. You can use DNS Leak Test to help with this.

You will run the Standard Test. The output should show CleanBrowsing in the response.
It is advised to take the time to flush your DNS resolver cache on your local machine and browser caches to ensure that your new DNS configuration settings take affect.It can take 10 – 15 minutes for the change to take affect, be patient. The additional time is the time required for your computer DHCP Lease to get the new DNS. If you disable your Wifi and re-enable, it will force it right away (you can also reboot the router).
If you experience issues please visit our Common Questions and Troubleshooting Guide for more help.
