These instructions will provide guidance on how to configure CleanBrowsing on a Calix 844G router.
Step 1: Access the Management Interface
The default login page is usually located here:
192.168.1.1
Reference router user guide for more guidance.
Step 2: Navigate to DNS Section
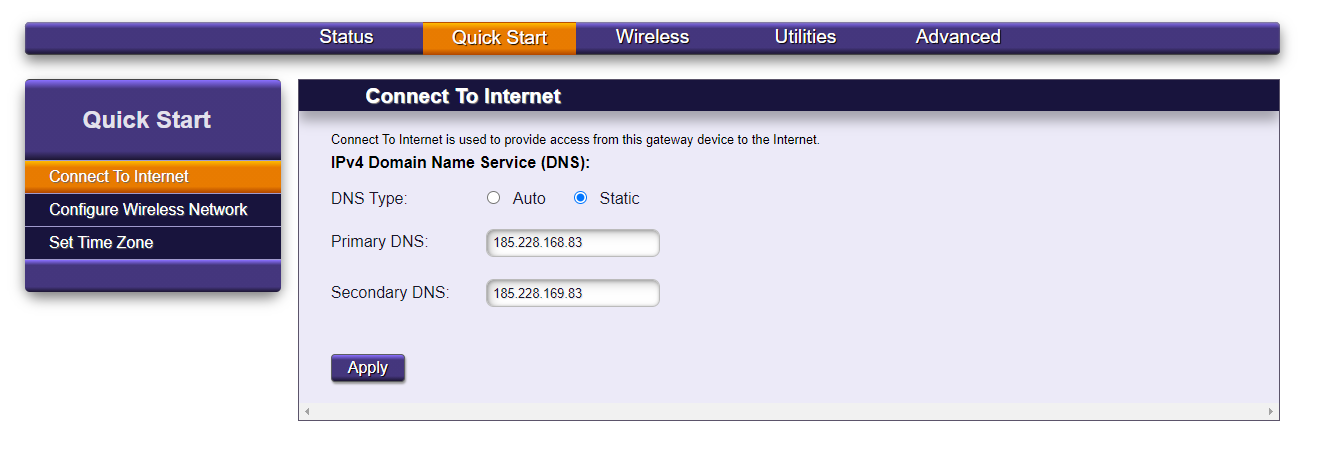
It is located in the Quick Start tab. Click on Connect to Internet in the left-hand navigation pane.
The Connect to Internet page will give you an option for Auto, or Static. Select the Static Radio button, which will expose the Primary and Secondary DNS input boxes.
Enter your IPv4 DNS values in these boxes:

