These instructions will provide guidance on how to configure CleanBrowsing on your Frontier router. You can find the user guide for this device here: https://www.verizon.com/about/sites/default/files/fios-qgr-userguide140925.pdf
Step 1: Access the router
To get started configuring the Frontier router log into your router here: http://myfiosgateway.com. If you are already logged in you can skip this step.
You will need to log in using your administrator credentials.
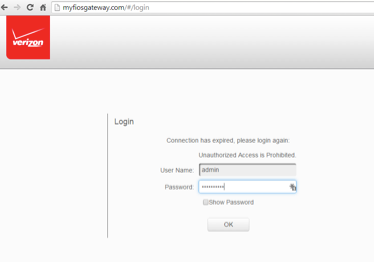
Step 2: Navigate to DNS Section in the Router Dashboard
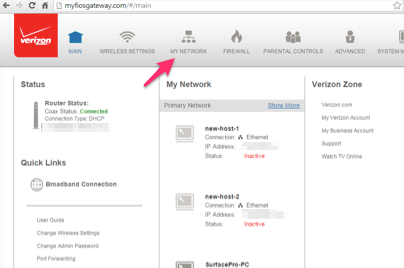
Click on the My Network icon
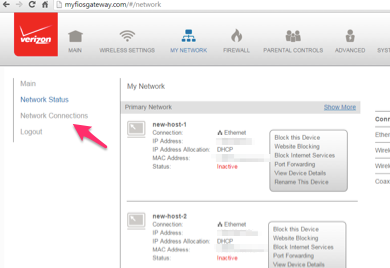
In the left hand menu clic the Network Connections link
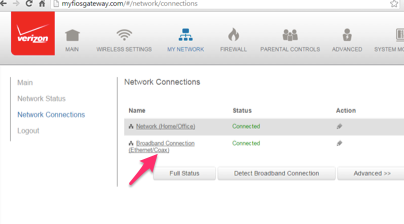
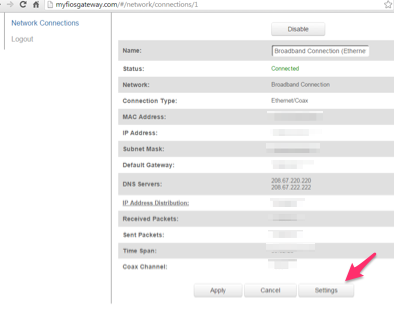
In the Network Connections menu click on Broadband Connection (Ethernet/Coax).
At the bottom of the Broadband Connection (Ethernet/Coax) screen click the Settings button.
Step 3: Update DNS Settings
Scroll down to the DNS Server section, change the drop-down to “Use the following DNS Server addresses”. The “Primary” and “Secondary” DNS Server address boxes are now visible.
The CleanBrowsing Family IP’s are:
- 185.228.169.168
- 185.228.168.168
Note: If you have a paid plan use the DNS IPs provided in your account.
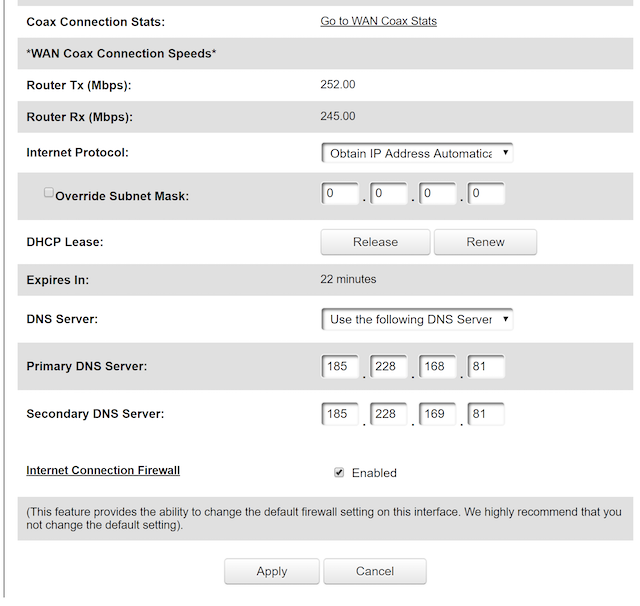
Enter the primary DNS server address in the box labeled Primary DNS Server. This is the address that is always used first.
Key in the secondary DNS server address in the box that reads Secondary DNS Server. This becomes a backup and is only used if the first can’t be located.
Finally, click the Apply button before you exit.
