
These instructions will provide guidance on how to configure CleanBrowsing on your Netgear NightHawk router, specifically using images from the NightHawk router. You can find the user guide for this device here: https://www.downloads.netgear.com/files/GDC/R7000/R7000_UM.pdf
🛡️ CleanBrowsing: Internet Safety Made Simple
Filter harmful websites, block adult content, and protect your entire network. All with fast, privacy-respecting DNS.
Start Filtering Here →Step 1: Access the router
You access the router by navigating to routerlogin.com. If that doesn’t work, you can navigate to 192.168.1.1. This is the IP the router will configure by default when it’s connected to your ISP gateway. If this IP doesn’t work you can use some of the defaults we provide on our generic router configuration page: Generic Router Instructions
You will need to log in using your administrator credentials.
It should look something like this:/images/guides/spectrum/CleanBrowsing-SpectrumF@st5260-IPv6.png 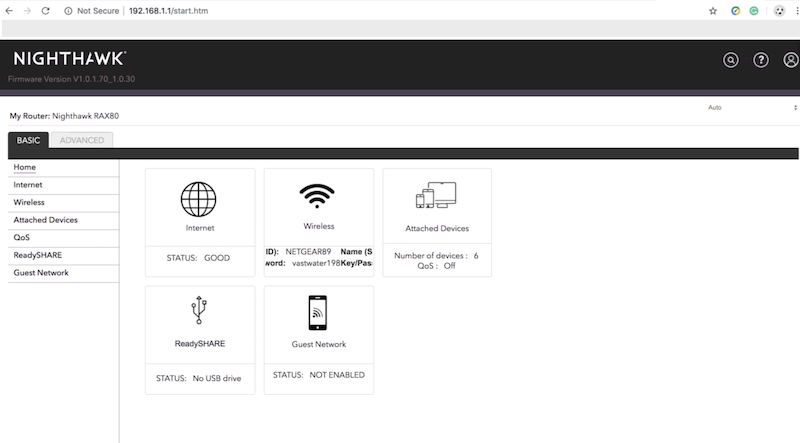
Step 2: Navigate to DNS Section in the Router Dashboard
Click on the Internet option on the left menu.
Scroll down to the DNS section:
Step 3: Update DNS Settings
In the Domain Name Server (DNS) Address section you will see two options. Select the option that reads Use These Servers:
You will enter the CleanBrowsing IP’s into the highlighted section in the image below:
The CleanBrowsing Family IP’s are:
- 185.228.169.168
- 185.228.168.168
Note: If you have a paid plan use the DNS IPs provided in your account.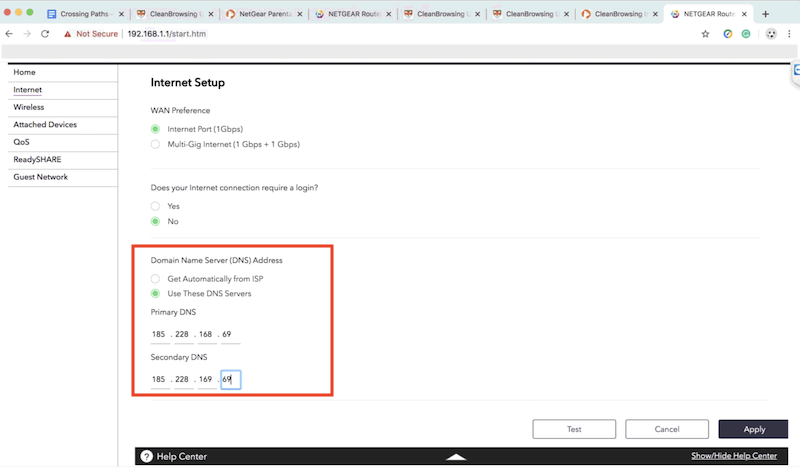
The final step is to save the change by clicking on Apply.
🚀 Power Your Web Infrastructure with NOC
NOC combines authoritative DNS, a global CDN, and an intelligent WAF into one high-performance platform. Protect your sites, reduce latency, and gain full control over your delivery stack.
Visit NOC →