
The article will show you how to update the DNS settings on your Unifi Dream Machine Pro (UDMPRO) device.
🛡️ CleanBrowsing: Internet Safety Made Simple
Filter harmful websites, block adult content, and protect your entire network. All with fast, privacy-respecting DNS.
Start Filtering Here →Step 1: Log into the Unifi Console
You will make the changes inside your UDM Pro Network Controller. It should be accessible via this link: https://unifi.ui.com/dashboard
Step 2: Navigate to DNS Section
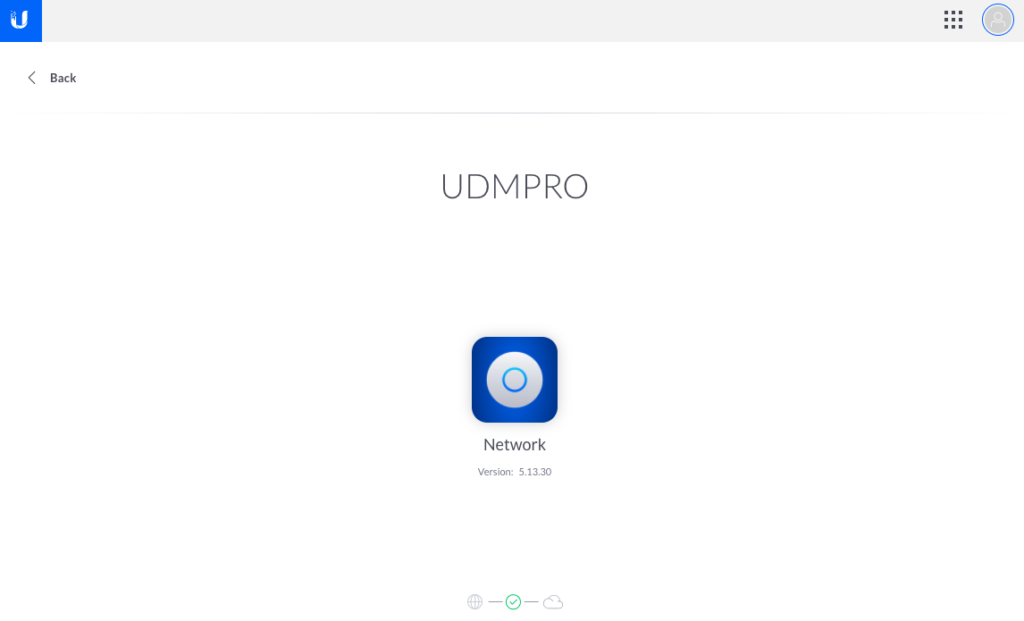
When you first log in, you will be created with a screen that shows you your devices.

Select your device.
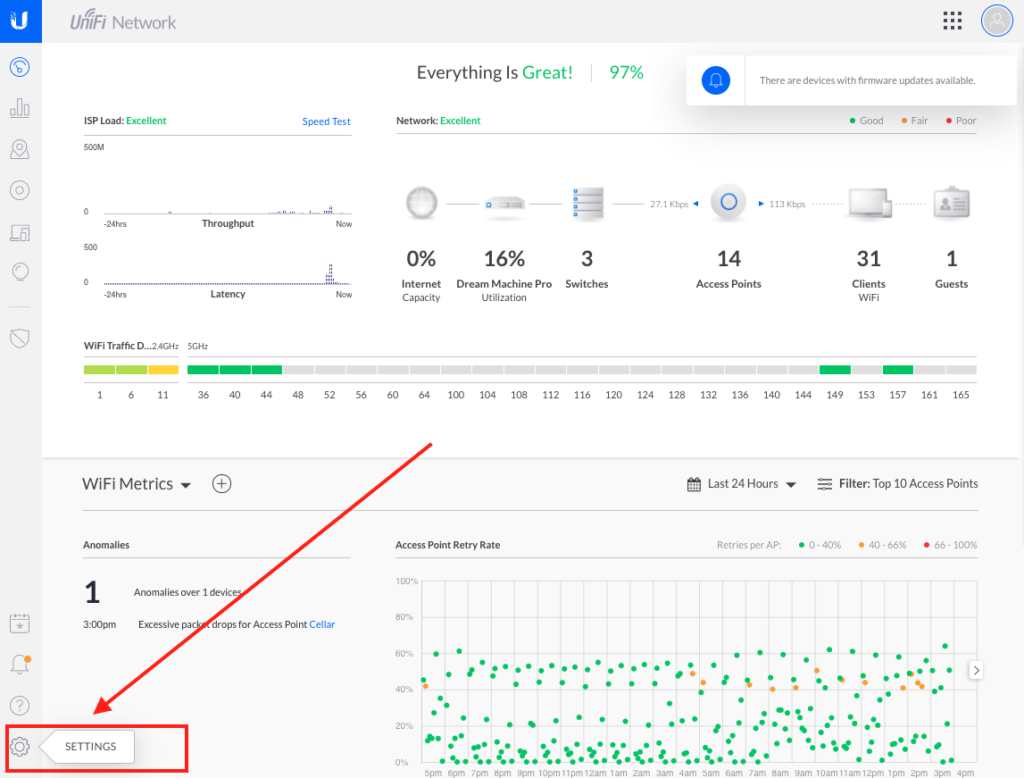
Click on the Gear option, bottom left of the table of contents:
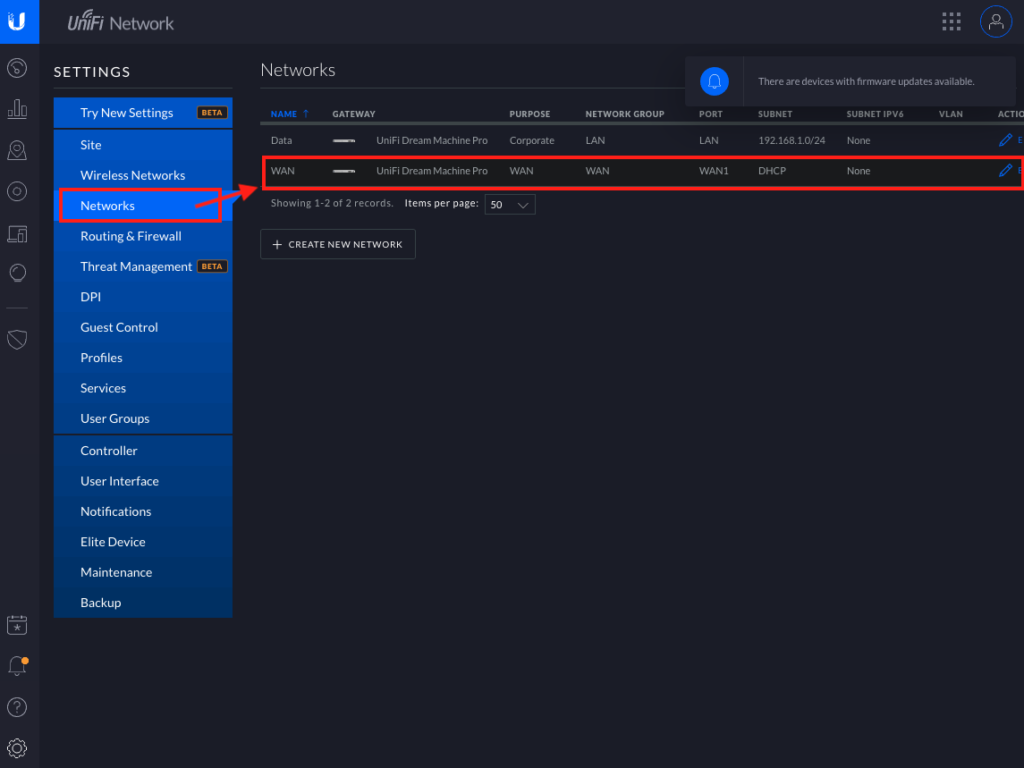
This will drop you into a new panel. Navigate to Networks. You will make your changes in the WAN settings.
Step 3: Update Network DNS
Scroll to the Common Settings section of the page, and update the DNS Server options:
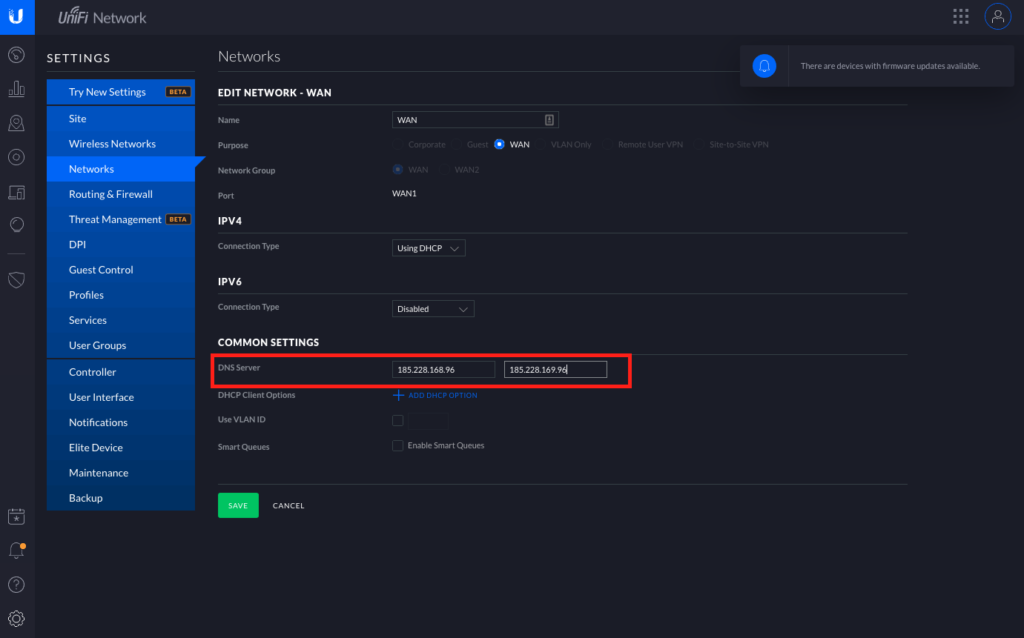
Hit SAVE, and it should update the entire network.
📦 Push DNS Logs to a Secure SIEM with Trunc
Trunc helps you forward CleanBrowsing DNS logs—and other system logs—to a secure, cloud-hosted SIEM. Get real-time visibility, threat detection, and compliance reporting without the overhead.
Explore Trunc →