
Google Chrome books are a little different than your normal desktop / notebook Operating System (OS). It’s built on a UNIX operating system, but its configurations occur in the Google Chrome browser and they introduce their own command line known as crosh. This article will apply the DNS changes using the Google chrome option.
Step 1: Open Settings
On a Google ChromeBook you will need to update the network in the settings panel. You can access the settings panel by clicking the “magnifying glass” on your ChromeBook dashboard.
Search for “settings“.
It opens default to the Network section:

Step 2: Configure CleanBrowsing DNS In Settings
Now navigate to the DNS Section of your device. Click the network that says “connected”:

Select the “network” option:

Scroll to where it says Name Servers.
Select Custom name servers and enter the DNS IP’s you’d like to use. In this example we’re using CleanBrowsing Family filter:

That’s it. Now close the settings dialog and it should be set. ChromeBook does not have an apply or save option.
Final Step: Verify Configuration
The final step is to verify the DNS configuration is working. You can use DNS Leak Test to help with this.
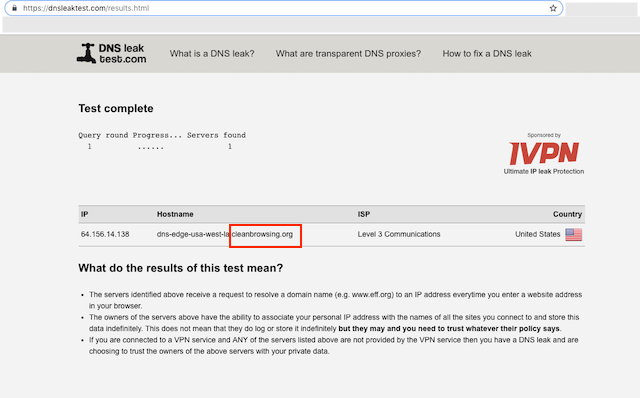
You will run the Standard Test. The output should show CleanBrowsing in the response.
It is advised to take the time to flush your DNS resolver cache on your local machine and browser caches to ensure that your new DNS configuration settings take affect.It can take 10 – 15 minutes for the change to take affect, be patient. The additional time is the time required for your computer DHCP Lease to get the new DNS. If you disable your Wifi and re-enable, it will force it right away (you can also reboot the router).
If you experience issues please visit our Common Questions and Troubleshooting Guide for more help.