
These instructions will provide guidance on how to configure CleanBrowsing on your Google Fiber routers. You can find guides for the different routers here:
Step 1: Access the router
Sign in to your Google Fiber using the email and password you use for your Fiber account
You will need to log in using your administrator credentials.
Step 2: Navigate to DNS Section in the Router Dashboard
Select Network at the top-left corner. (If you don’t see it, click the navigation menu to display the selection.)
In the settings pane, click Advanced; then click the DNS tab.
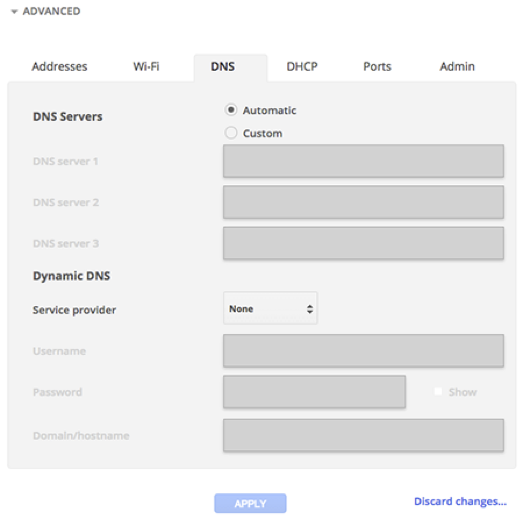
Step 3: Update DNS Settings
Select Custom for DNS Servers.
Enter the IP addresses in the DNS server fields.
The CleanBrowsing Family IP’s are:
- 185.228.169.168
- 185.228.168.168
Note: If you have a paid plan use the DNS IPs provided in your account.
Select ApplyNote: If you have a paid plan use the DNS IPs provided in your account.