
These instructions will provide guidance on how to configure CleanBrowsing on a D-Link Router device, specifically using images from the DSL-225 router. You can find the user guide for this device here: http://files.dlink.com.au/Products/DSL-G225/Manuals/DSL-G225_J1_Manual_v1.00(WW).pdf
Step 1: Access the router
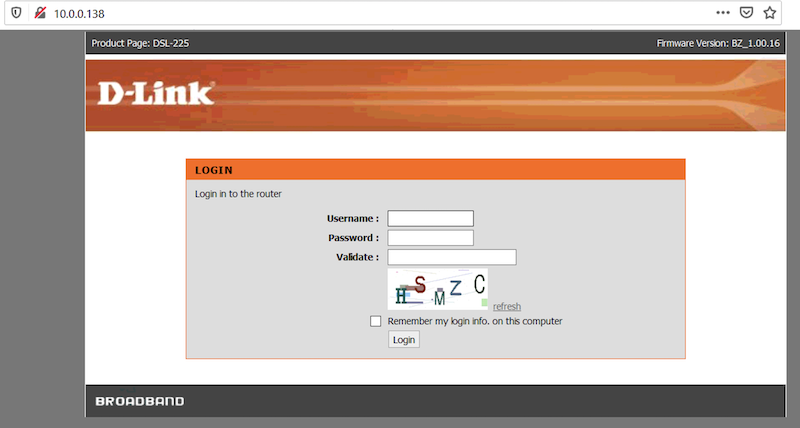
You access the router by navigating to the local IP address in your browser. It’s often 10.0.0.138. If this IP doesn’t work you can use some of the defaults we provide on our generic router configuration page: Generic Router Instructions
You will need to log in using your administrator credentials.
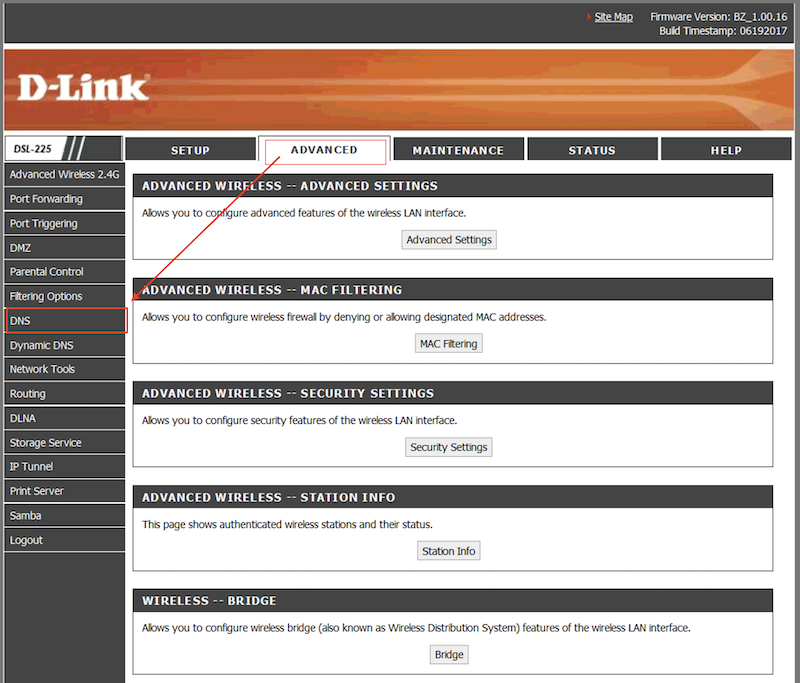
Step 2: Navigate to DNS Section in the Router Dashboard
Click on the Advanced menu tab.
Click on DNS option in the table of contents sidebar.
The DNS section is located in the Dynamic IP (DHCP) Internet Connection Type section.
Step 3: Update DNS Settings
Enable Use the following Static DNS IP address and enter the CleanBrowsing IP’s to get it to work.
The CleanBrowsing Family IP’s are:
- 185.228.169.168
- 185.228.168.168
Note: If you have a paid plan use the DNS IPs provided in your account.
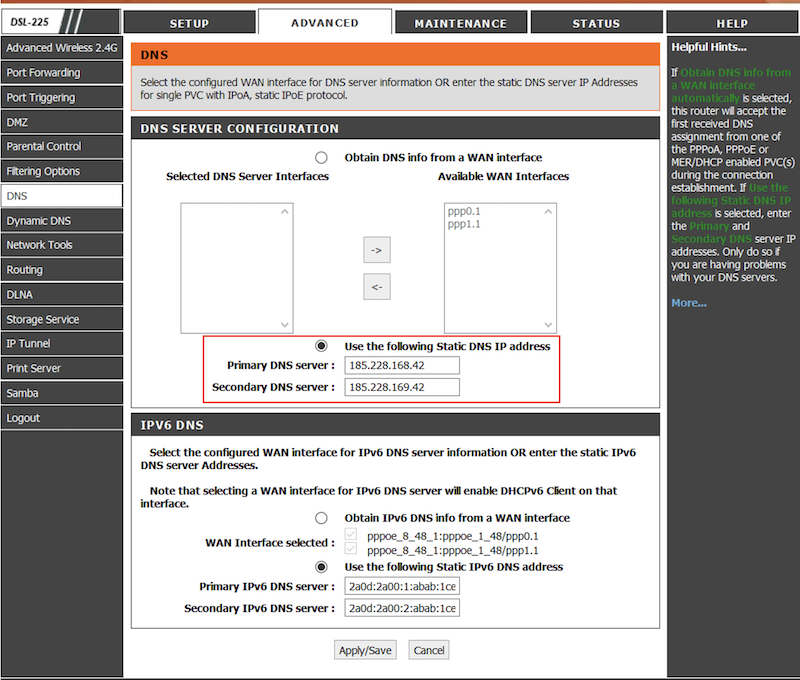
The final step is to save the change by clicking on Apply / Save and reboot to force the changes to take affect.